Frozen Bubble Experiment | Creative Winter Photography
Here in North Idaho, we see our fair share of cold weather during the winter months. And since the winter season is typically when I get to enjoy a slower pace of life when it comes to my work as a wedding and portrait photographer, it’s nice to have the time to challenge my skills in other ways. Sometime last year, I came across this video posted online of a bubble freezing in real time. It was one of the most beautiful and calming things I had ever seen. I remember doing some initial research, and thought I had come across an article claiming that temperatures would need to be close to zero or below in order this phenomena to take place. So when we had a cold front come through in early February, it felt like the perfect opportunity to try out my bubble-making skills.
Turns, it’s not as simple as just mixing some soap with water. There needs to be an added agent that will give the bubble some thickness and stickiness so that it will keep its shape long enough to freeze over. Below is the exact recipe that I used for this really fun and easy frozen bubble experiment.
Frozen Bubble Solution:
- 1 1/2c Water
- 1/4 c Corn Syrup
- 1/2c Clear Dish Soap
Directions:
STEP 1 – Combine Corn Syrup and Water to any glass jar that will hold at least 2 cups of liquid. I like to use slightly warm water so that the corn syrup dissolves more easily. Gently stir the corn syrup and water to combine
STEP 2 – Add the Clear Dish Soap. I used Dawn Free & Clear. Very gently stir to combine without creating bubbles or suds.
STEP 3 – Depending on how cold it is outside, you may want to put the solution into the fridge for a little while to get it cold from using warm water to mix it up.
Ideal Outside Temperature
Now, I mentioned that I once read about this only being successful on days when it’s close to zero or below. This is definitely NOT true. The morning I was creating these bubbles, the temperature ranged from 15-25 degrees Fahrenheit. Here’s what to you should keep in mind…
The colder it is, the faster the bubble will freeze. So depending on your desired experience, try making your frozen bubbles at various different outdoor temperatures to get a feel for how fast you’d like to enjoy this phenomenon. Personally, I prefer temperatures between 20 and 30 degrees, because it offers a nice slow transformation that’s to catch all the details of.
Wind is Your Enemy!
But there’s more! Even though corn syrup is added to help keep the frozen bubble stable, they are still VERY fragile. A tiniest of breezes will make the bubble pop. Believe me, you’ll watch more bubbles pop than you will watch them freeze. It’s just the name of the game. Patience is key!
The Process:
The last item you’ll need is a straw. I just used a small metal straw, but plastic is fine, too. Just simply dip the straw into the solution. No need to stir it around (so long as your solution is already mixed thoroughly). The first bubble almost never works. Just expect it to happen.
When you go to make your bubble, there’s no need to huff and puff and blow the house down with this. A very, very gentle, slow exhale is all you need. You’ll quickly get the feel for it as you experiment.
Lighting & Setup:
If you’re going through the trouble of conducting this frozen bubble experiment, you’re also probably going to want to take pictures and or video as well, right?
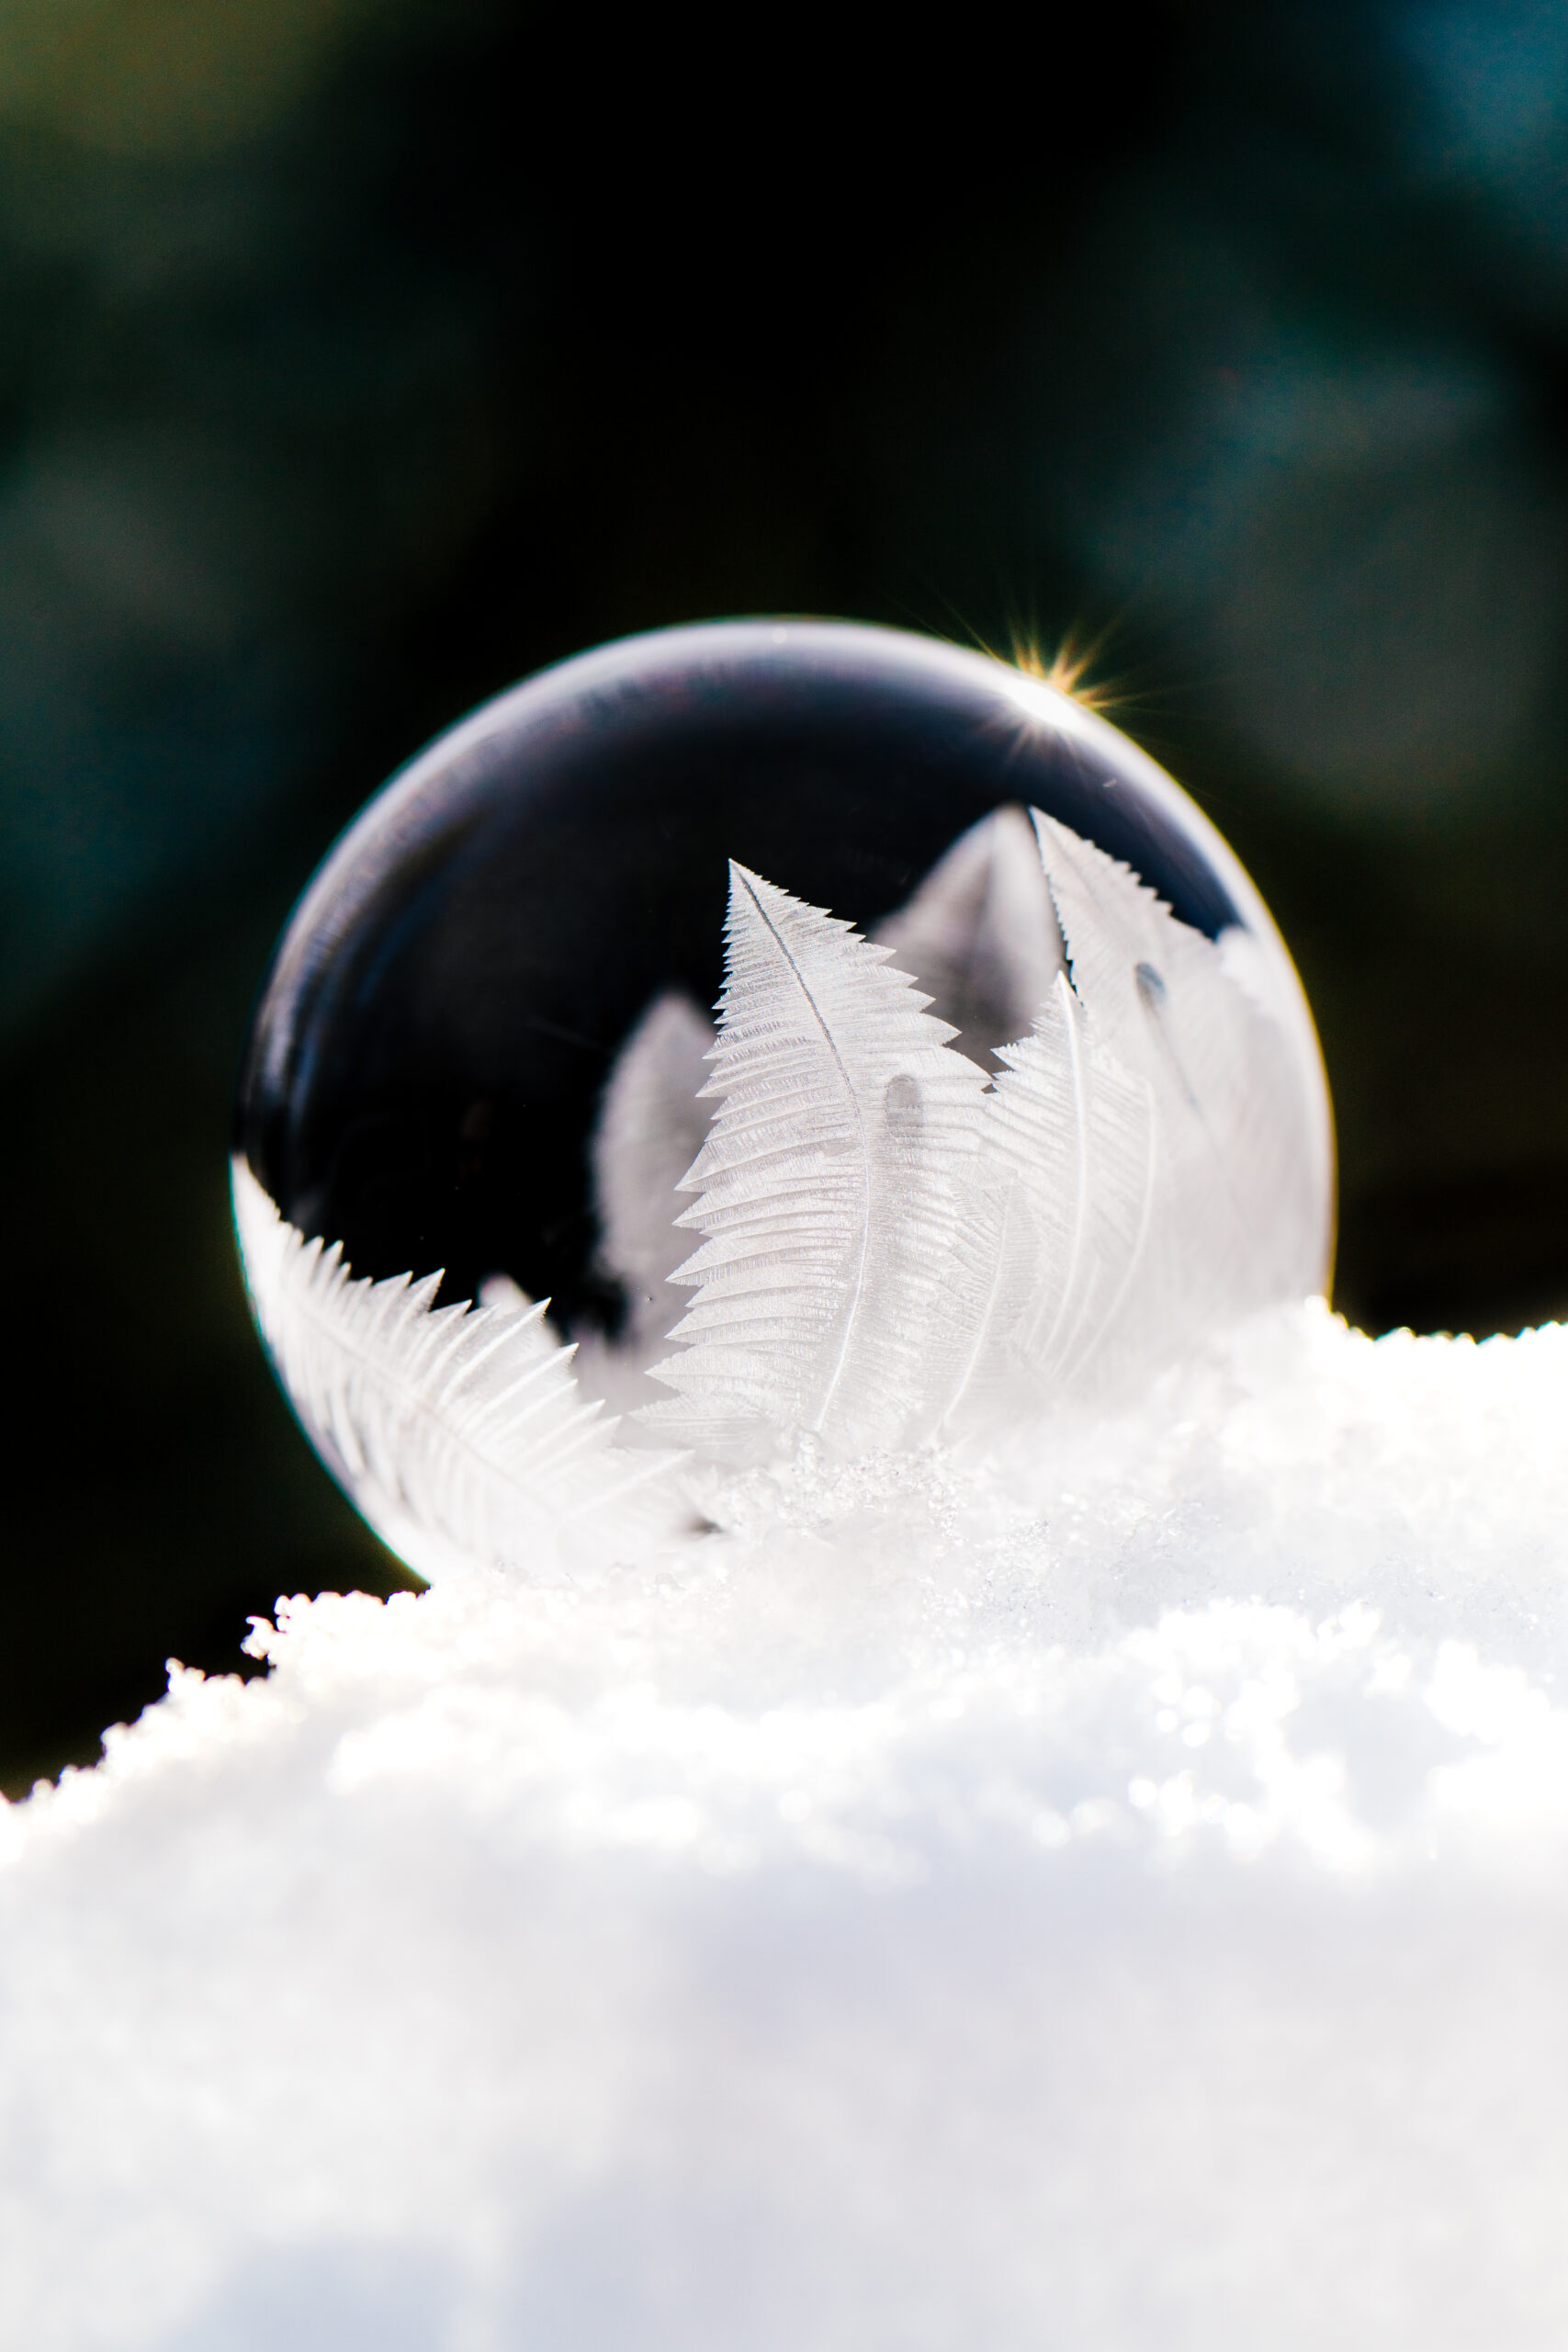
When choosing a spot to blow your frozen bubbles, you’re going to want the sun behind the bubble (or even sometimes slightly from the side) in a place where the distant background is also something dark (trees or a building off in the distance work great and they don’t have to be close by). The sun will make the bubble glow from the back while the dark background offers a beautiful contract to the clear/white bubble as it freezes.
The easiest way to find the perfect spot is to first find the sun and directly face it. Then find a spot where the sun is shining directly on the type of surface you’re wanting to use. I suggest snow if you have it. If you don’t have a pile of snow close by that has sun shining on it, you can always scoop up some snow and place it wherever you need. I’ve also seen people balance their frozen bubble on something small for a more interesting shot, but I prefer the look and lighting from snow.
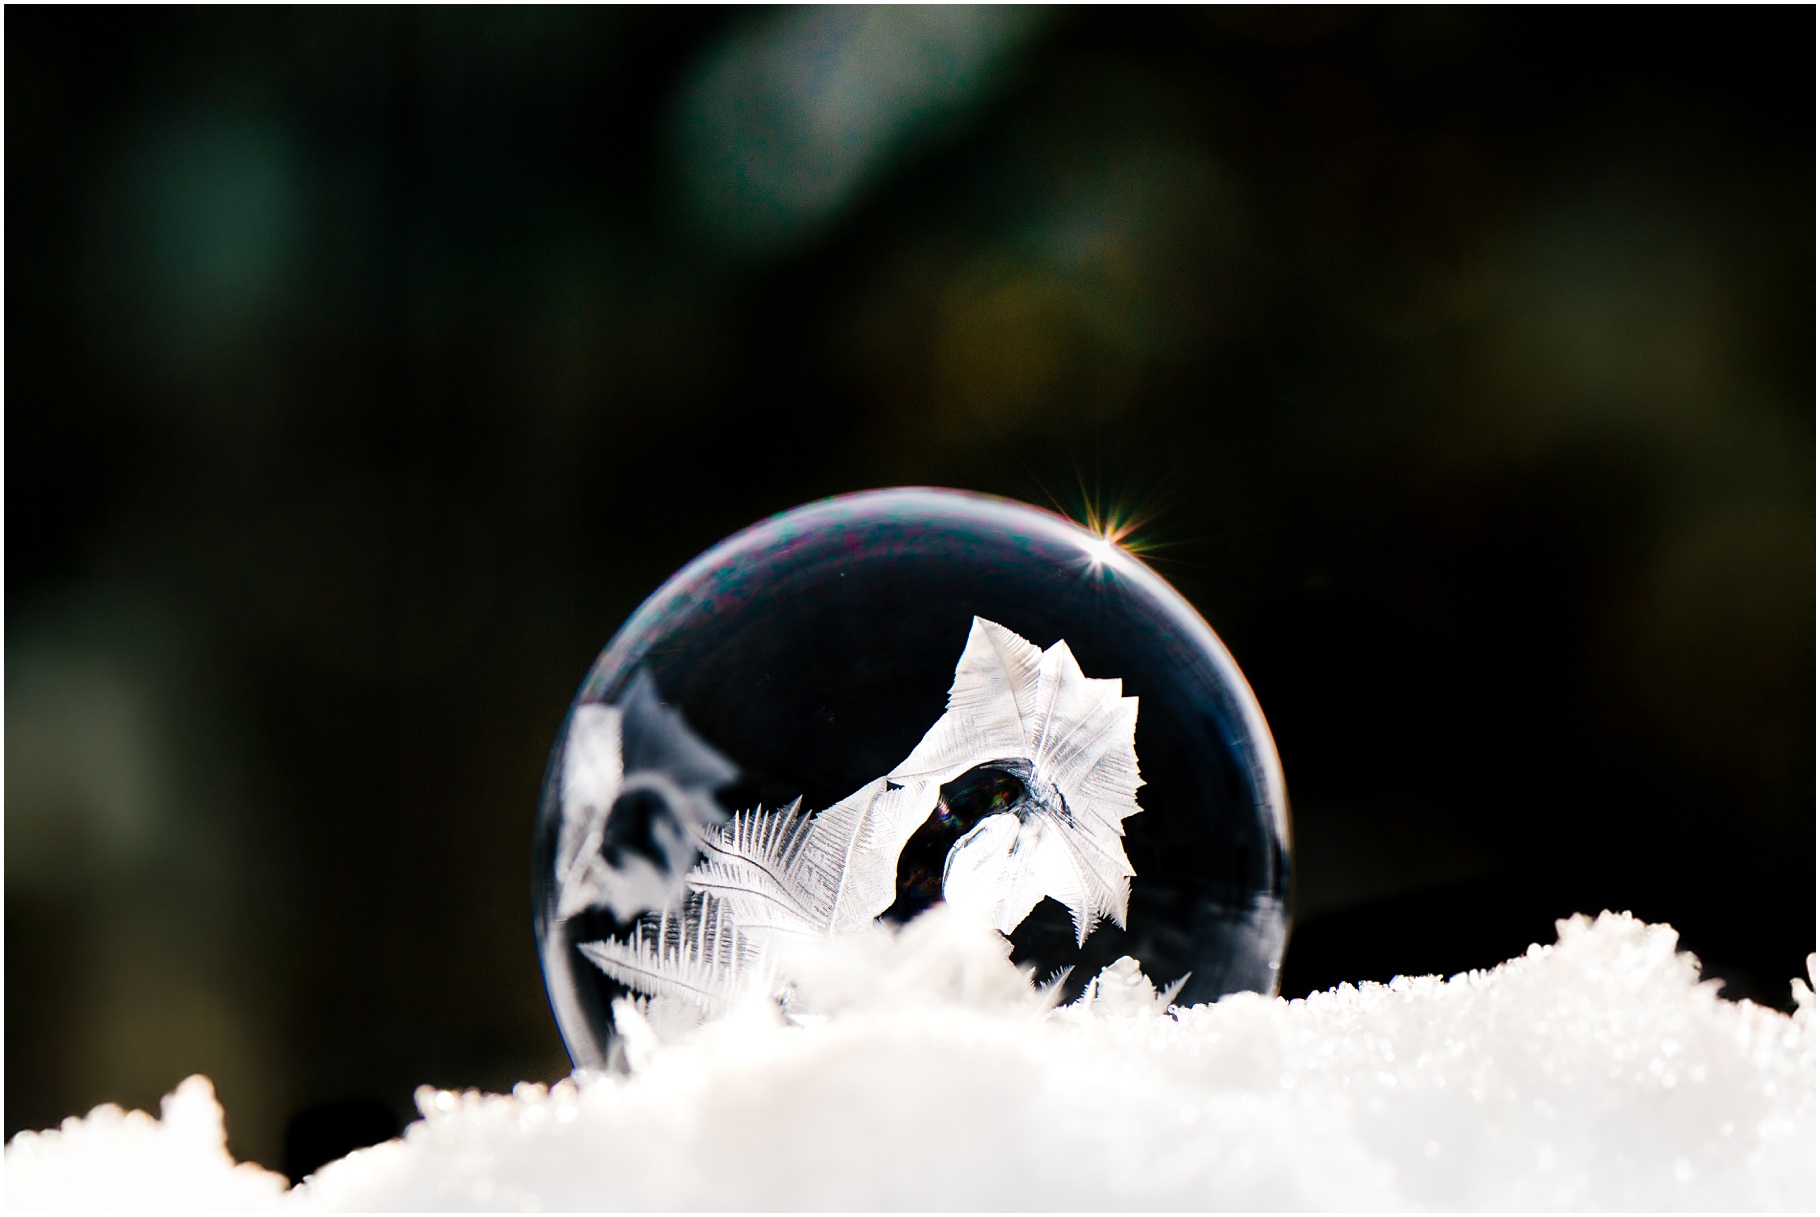
Here’s an example of a not-so-ideal location choice. Although the bubble was being hit with the sun from behind, and is all beautiful and glowy, the dark background isn’t directly behind it. See how the bubble is more eye-catching on the lefthand portion where the trees are behind it verses the portion of the bubble that’s in front of the sky?
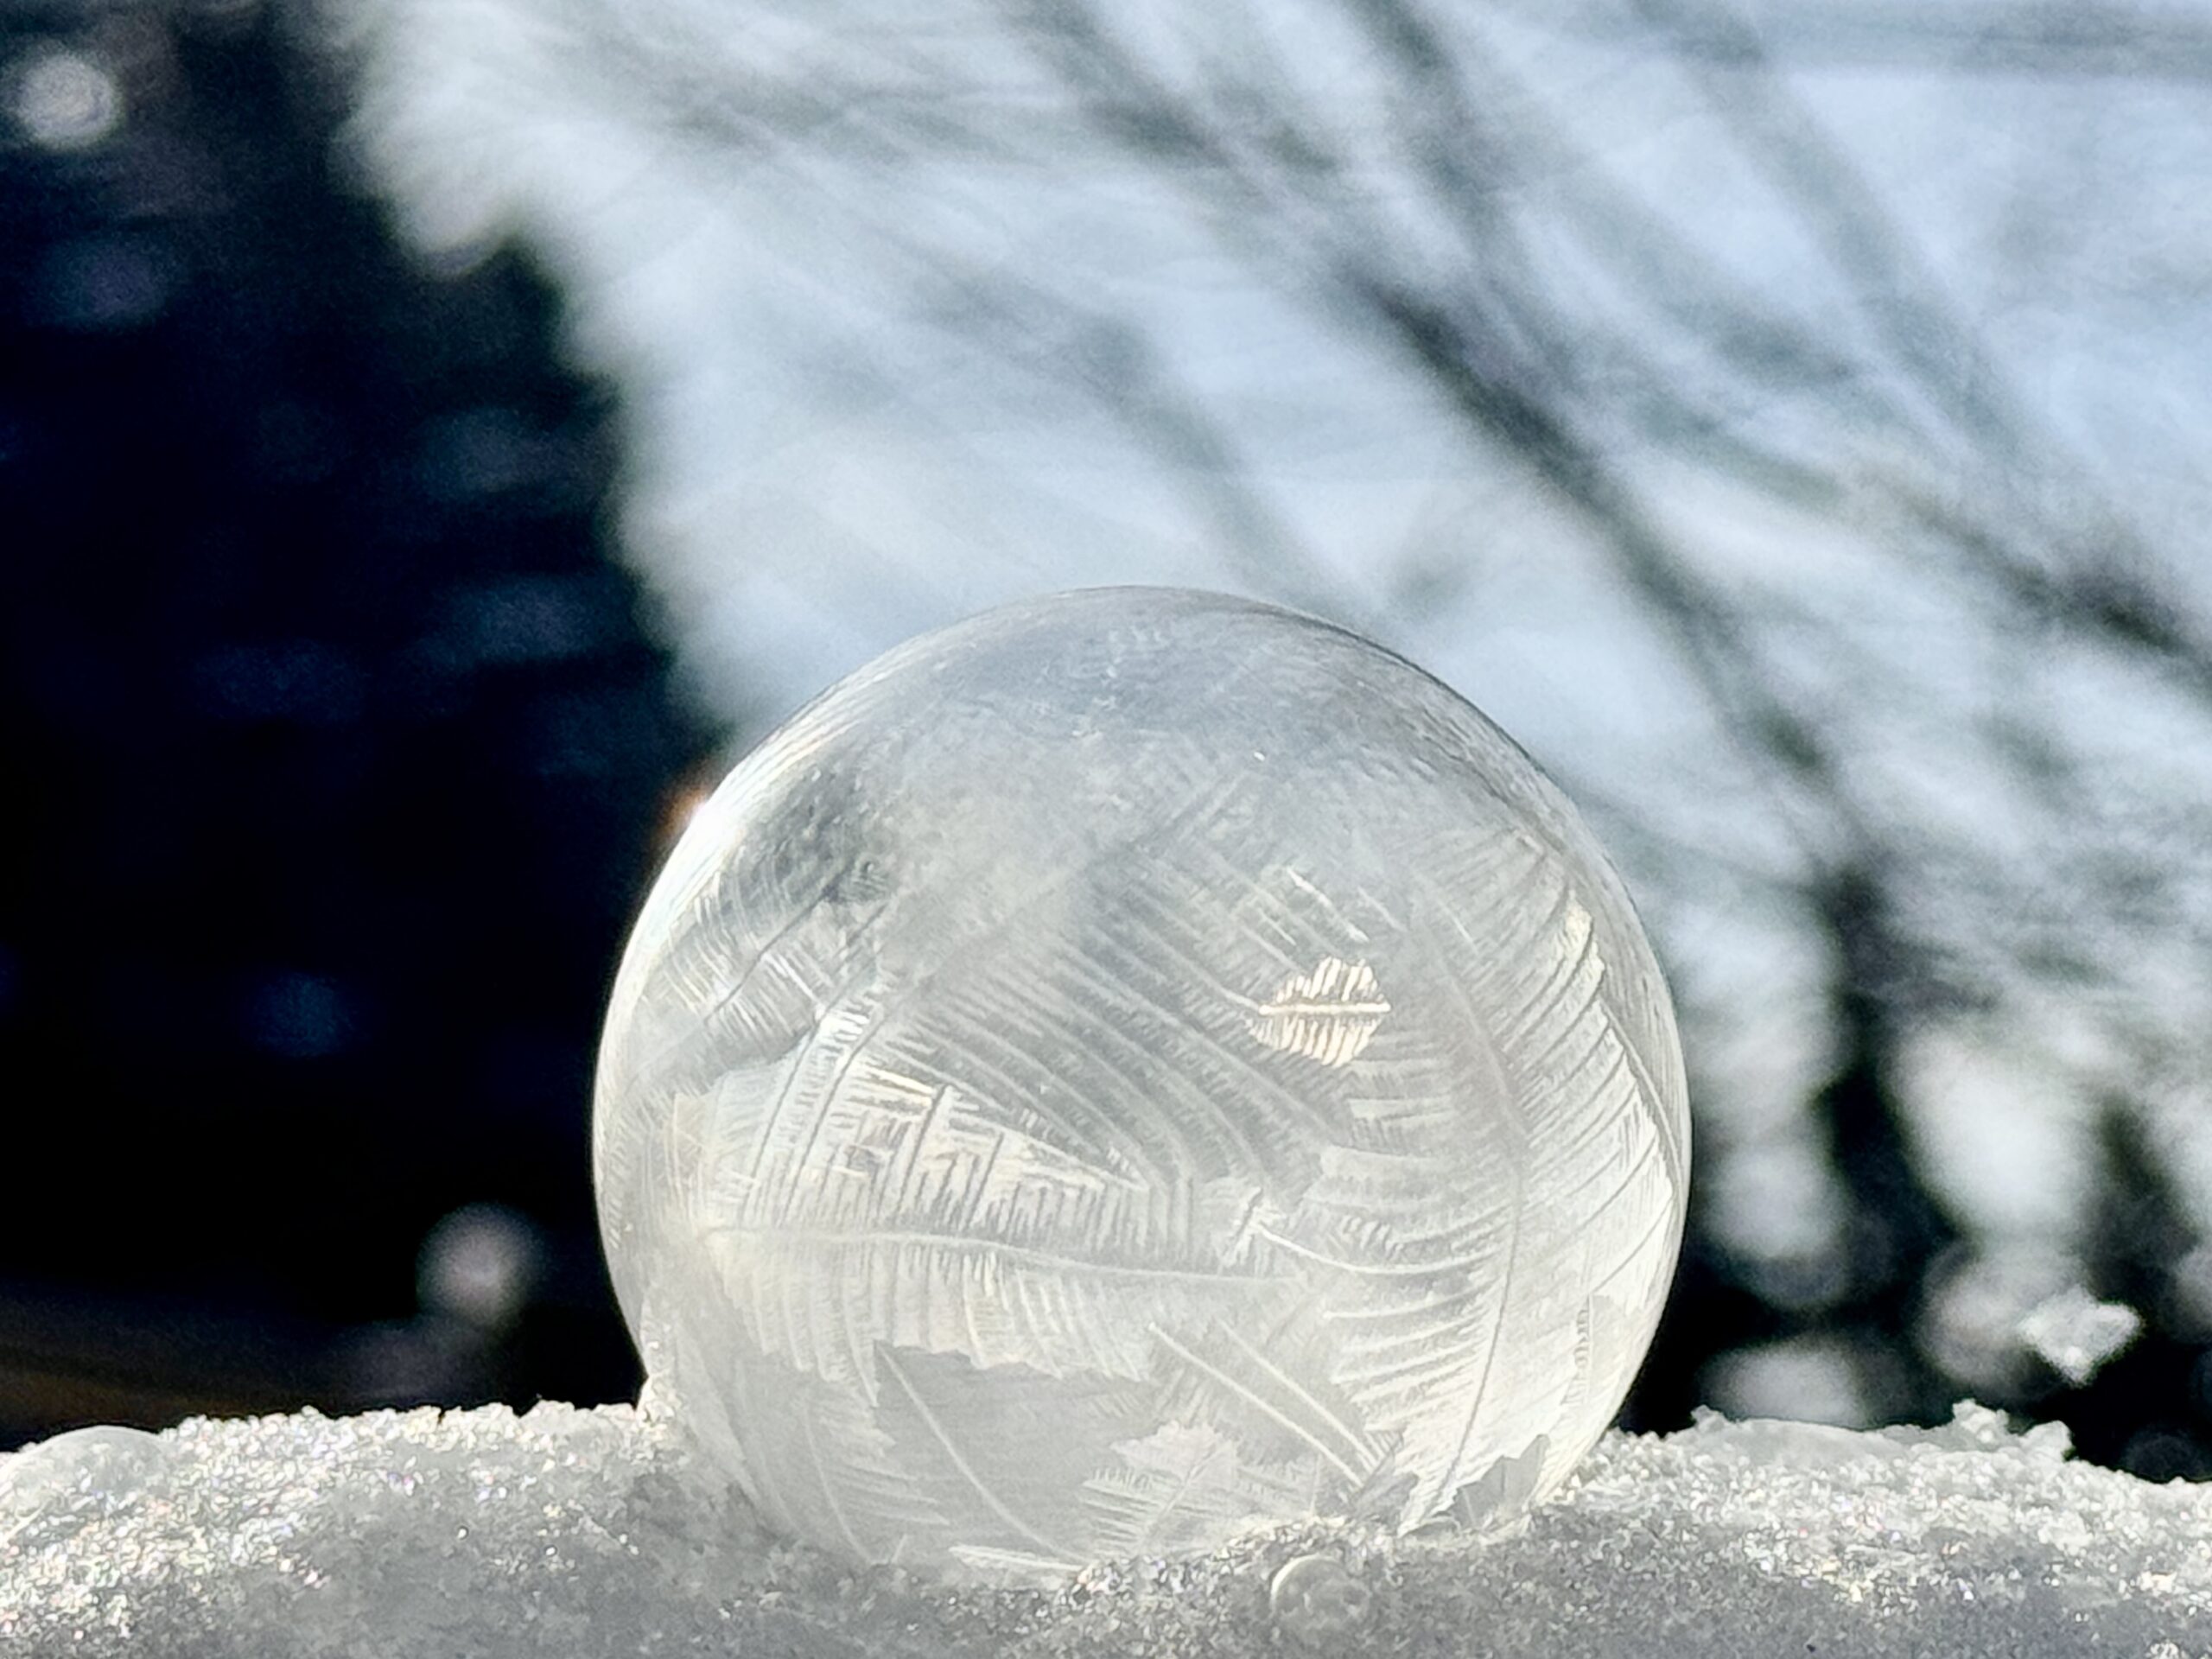
And for those of you who are thinking you need some sort of fancy camera to capture your own frozen bubble images, no worries! The photo above was taken with my iPhone 15 Pro. I did edit the contrast a little bit to help bring out some of the details in the sphere, so just imagine how much detail was missing simply because I didn’t have the proper background to make it POP!
The video above is just one example of how you can capture your own really cool freezing bubble transformations at home with just your cell phone. This video is real time and not slowed down at all.
The images below were a team effort between my husband and me. In order to catch the ever-changing ice formations with my professional camera, I needed someone else blowing the bubble for me. I knew I wouldn’t be able to do both. It took a lot of time and patience as the wind has picked up, and the bubbles kept popping. We managed to get three good bubbles, and the results were spectacular! Enjoy!
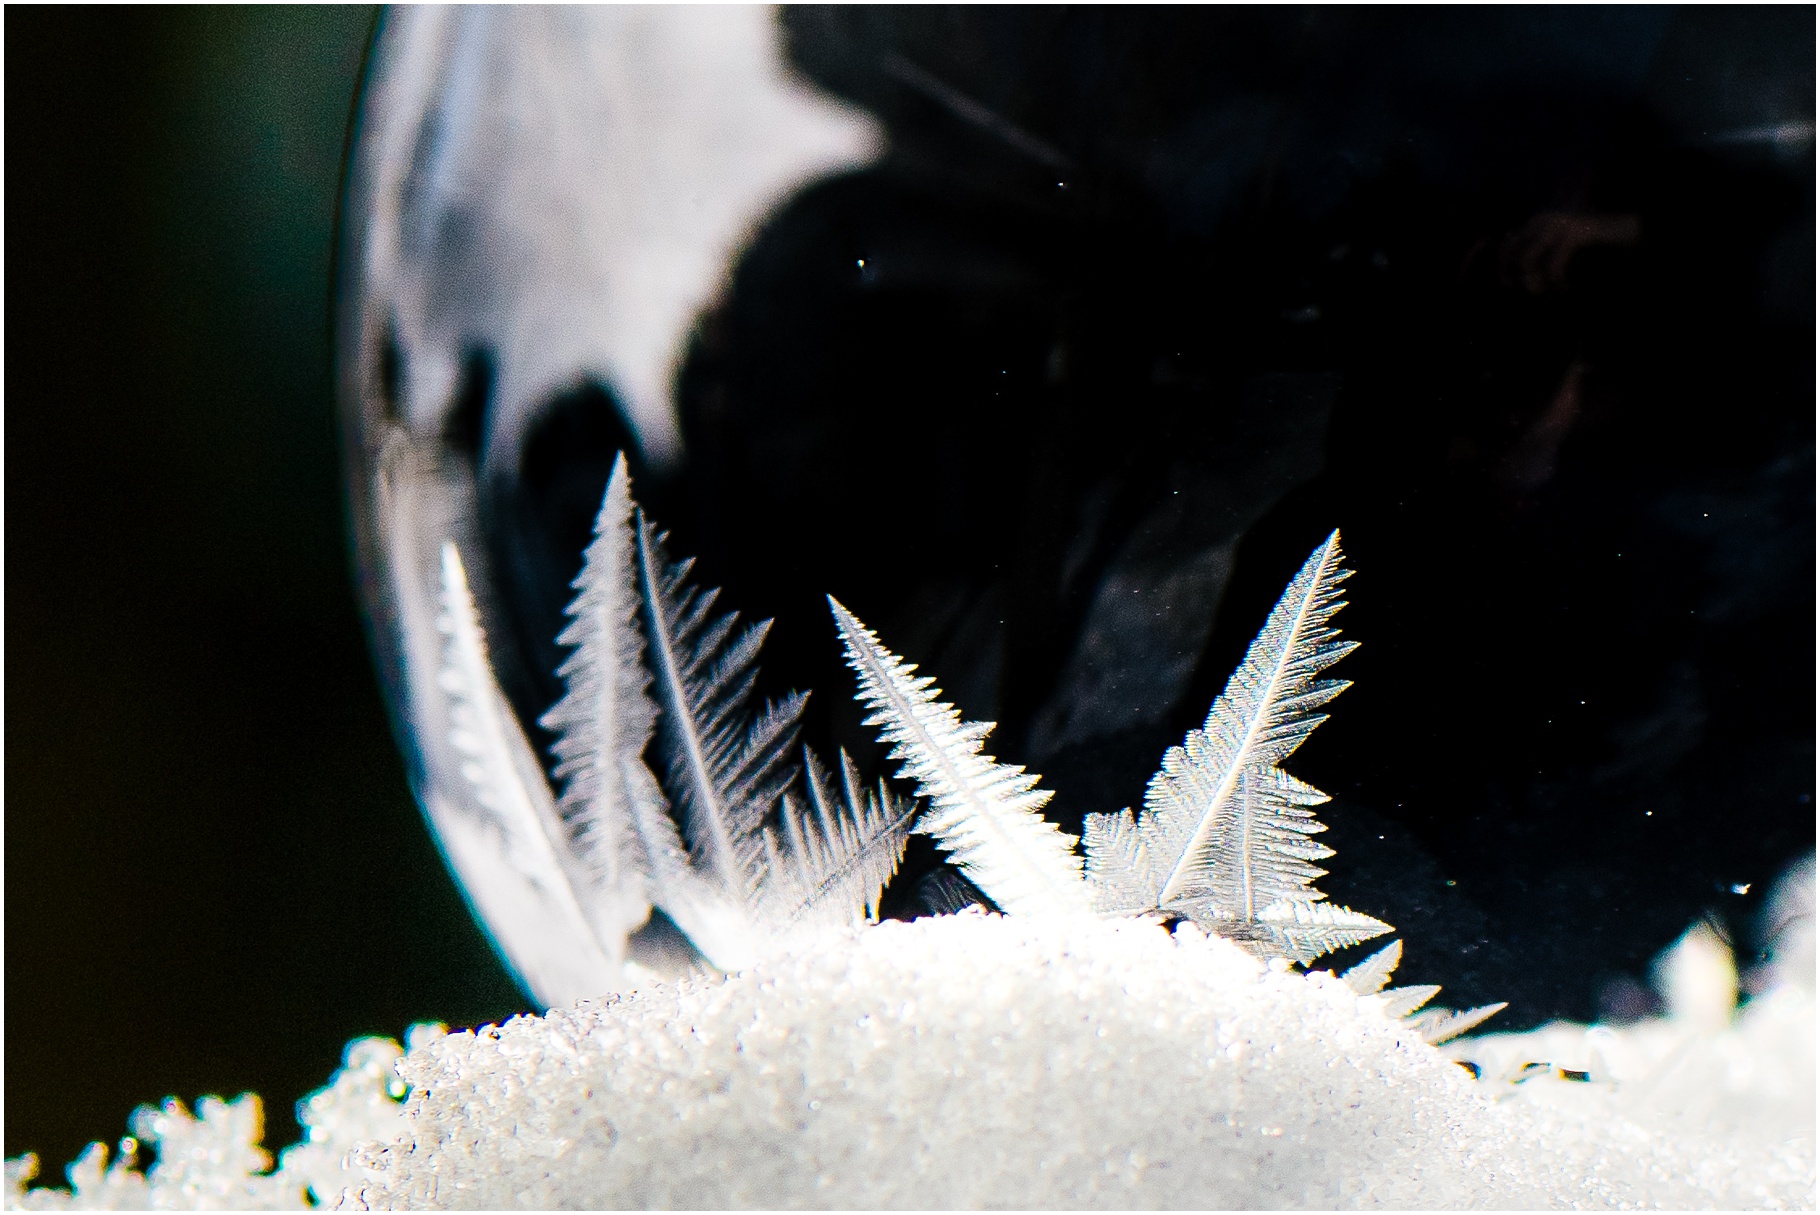
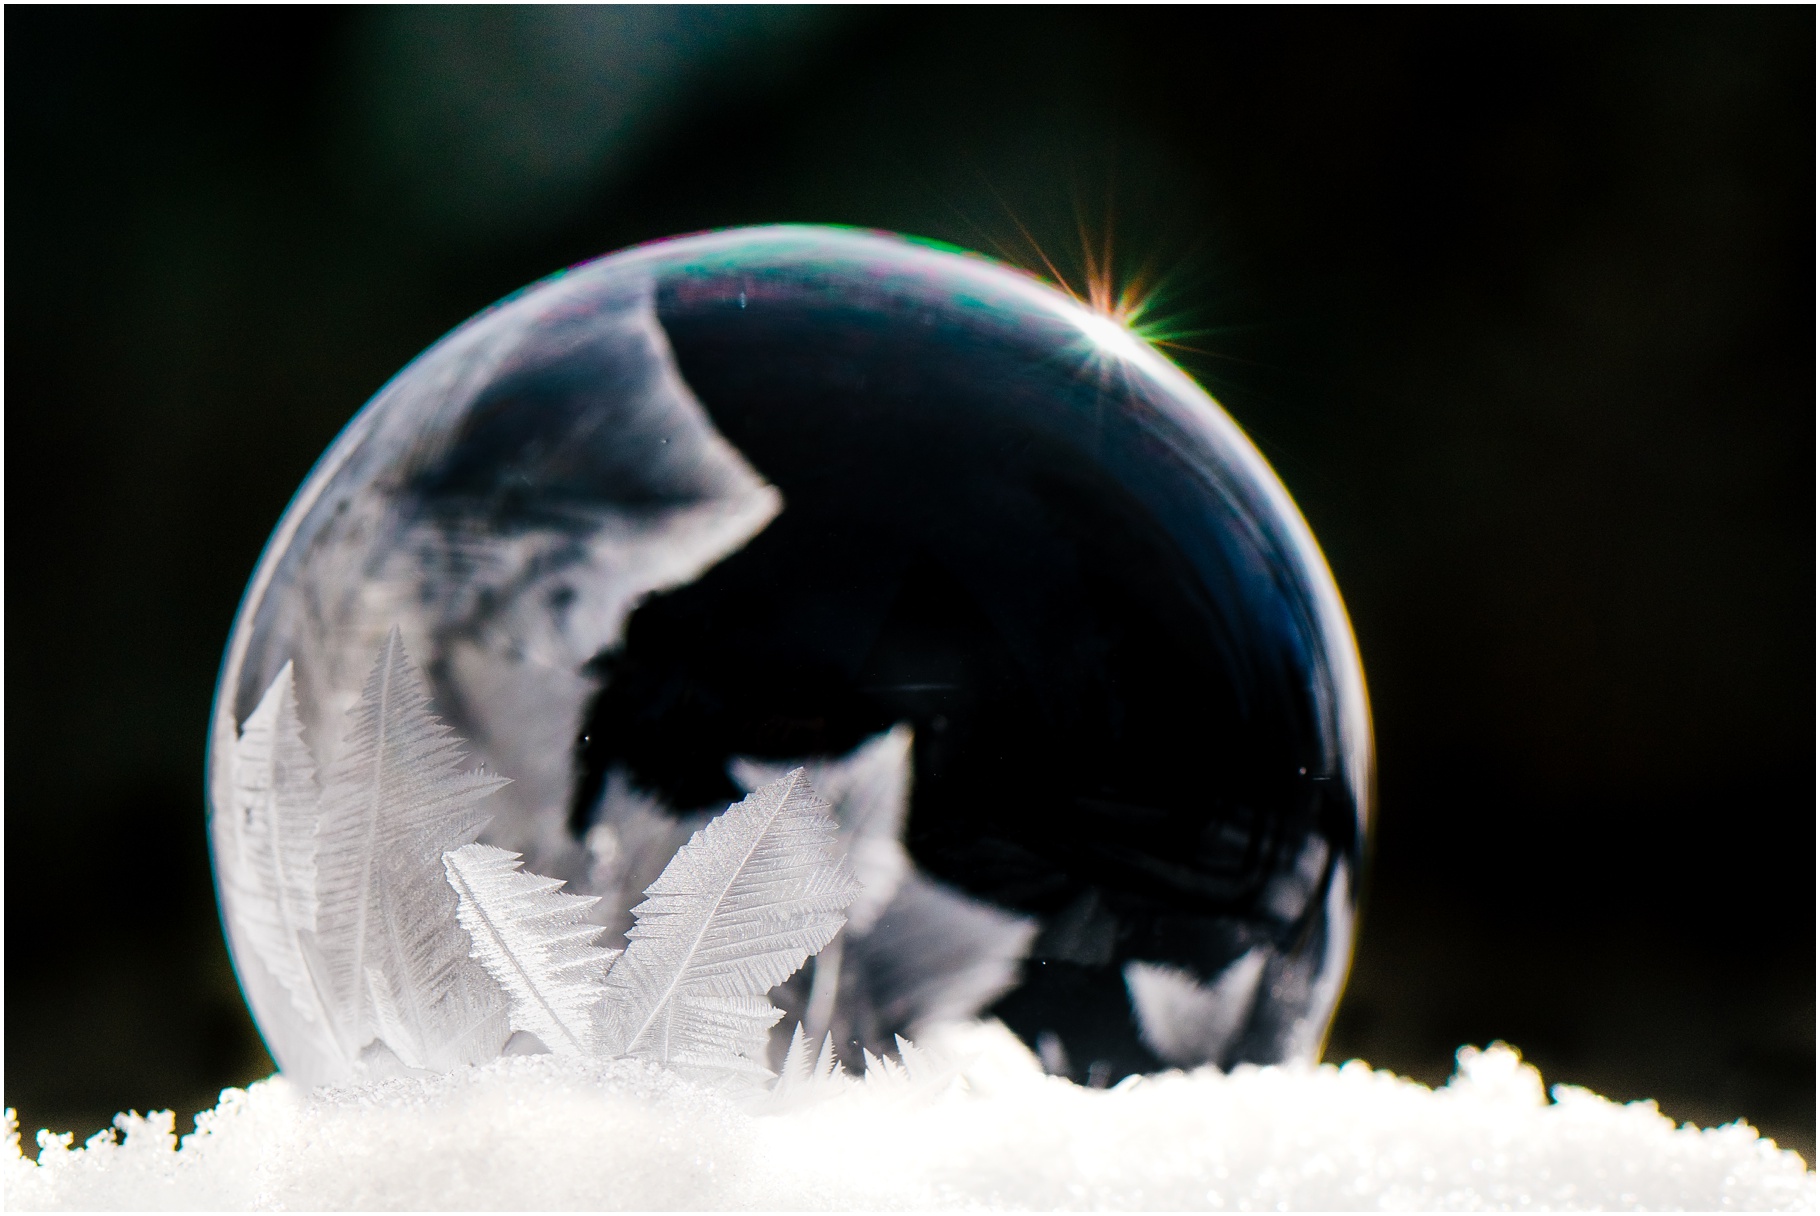
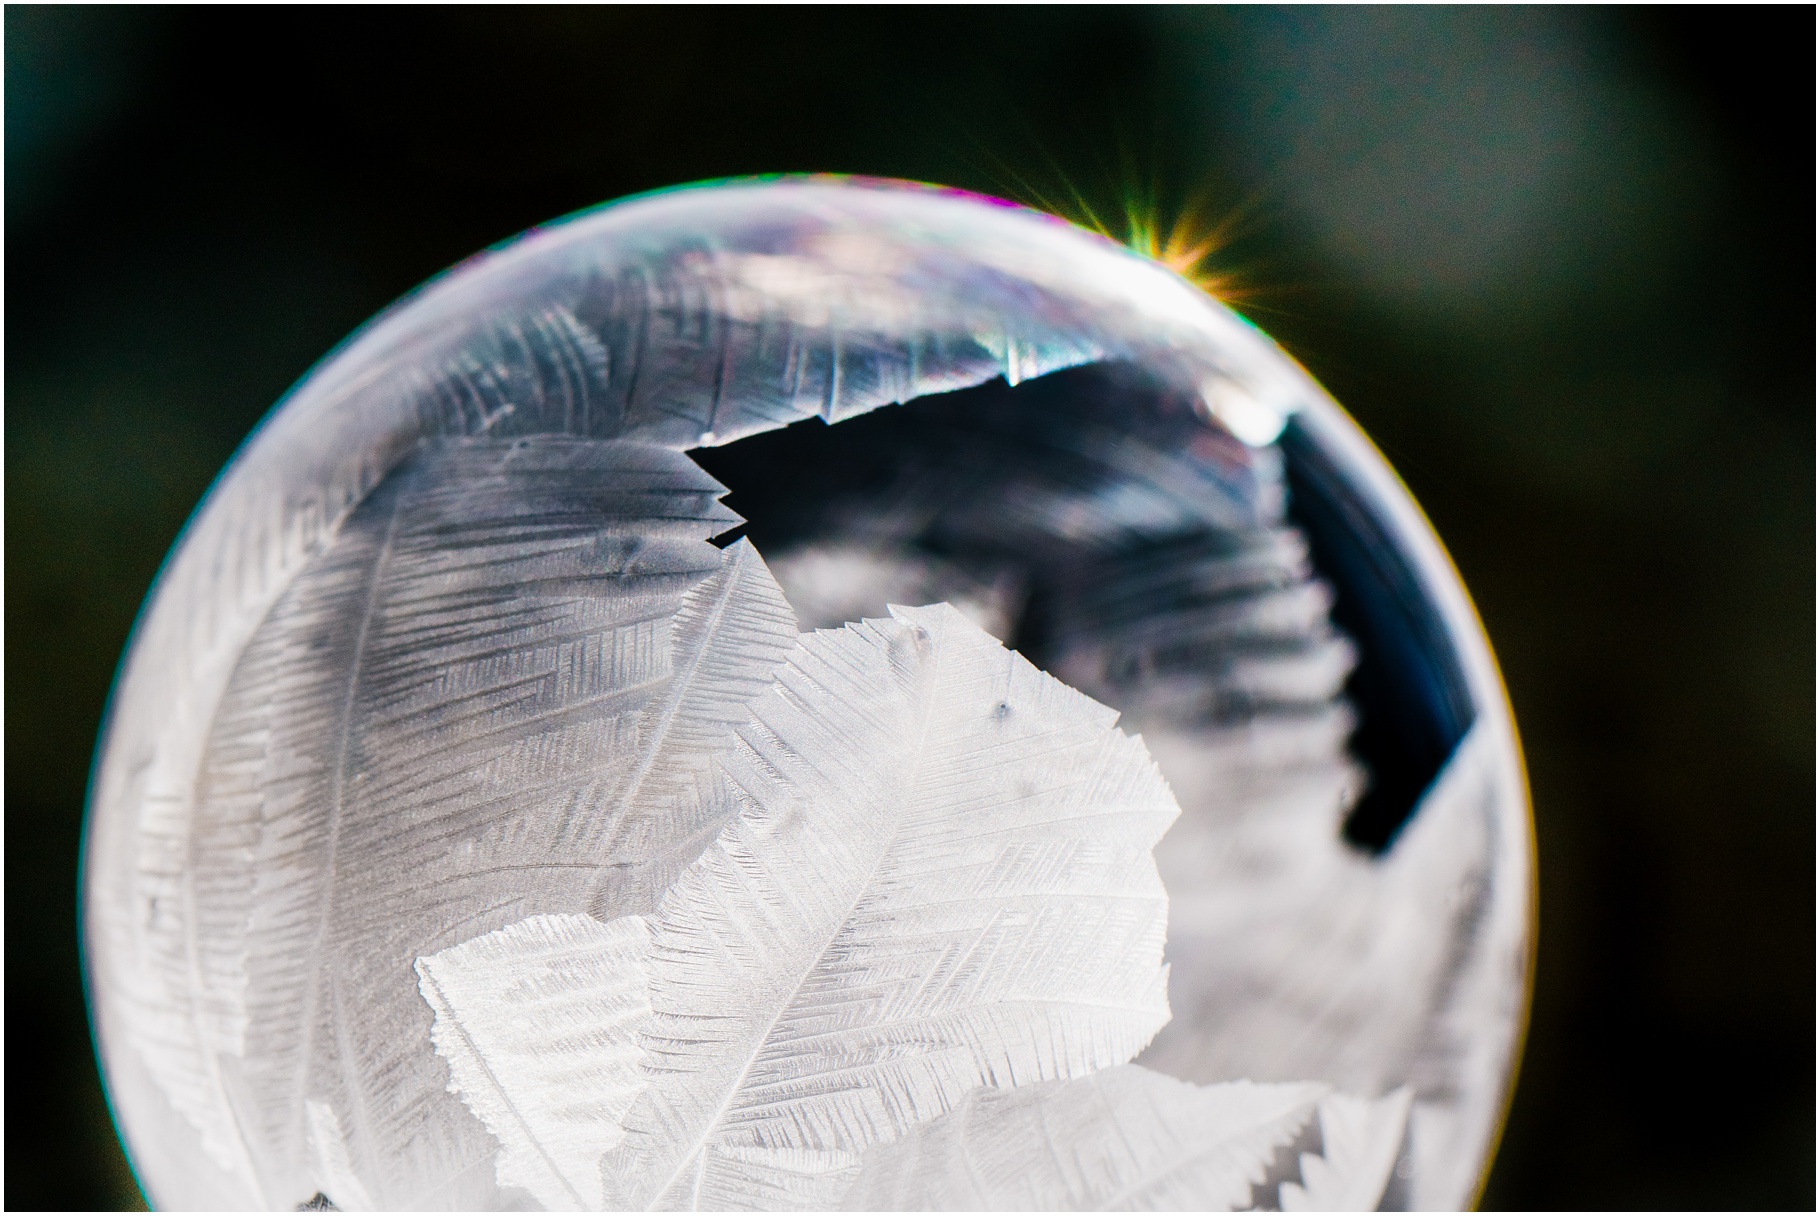
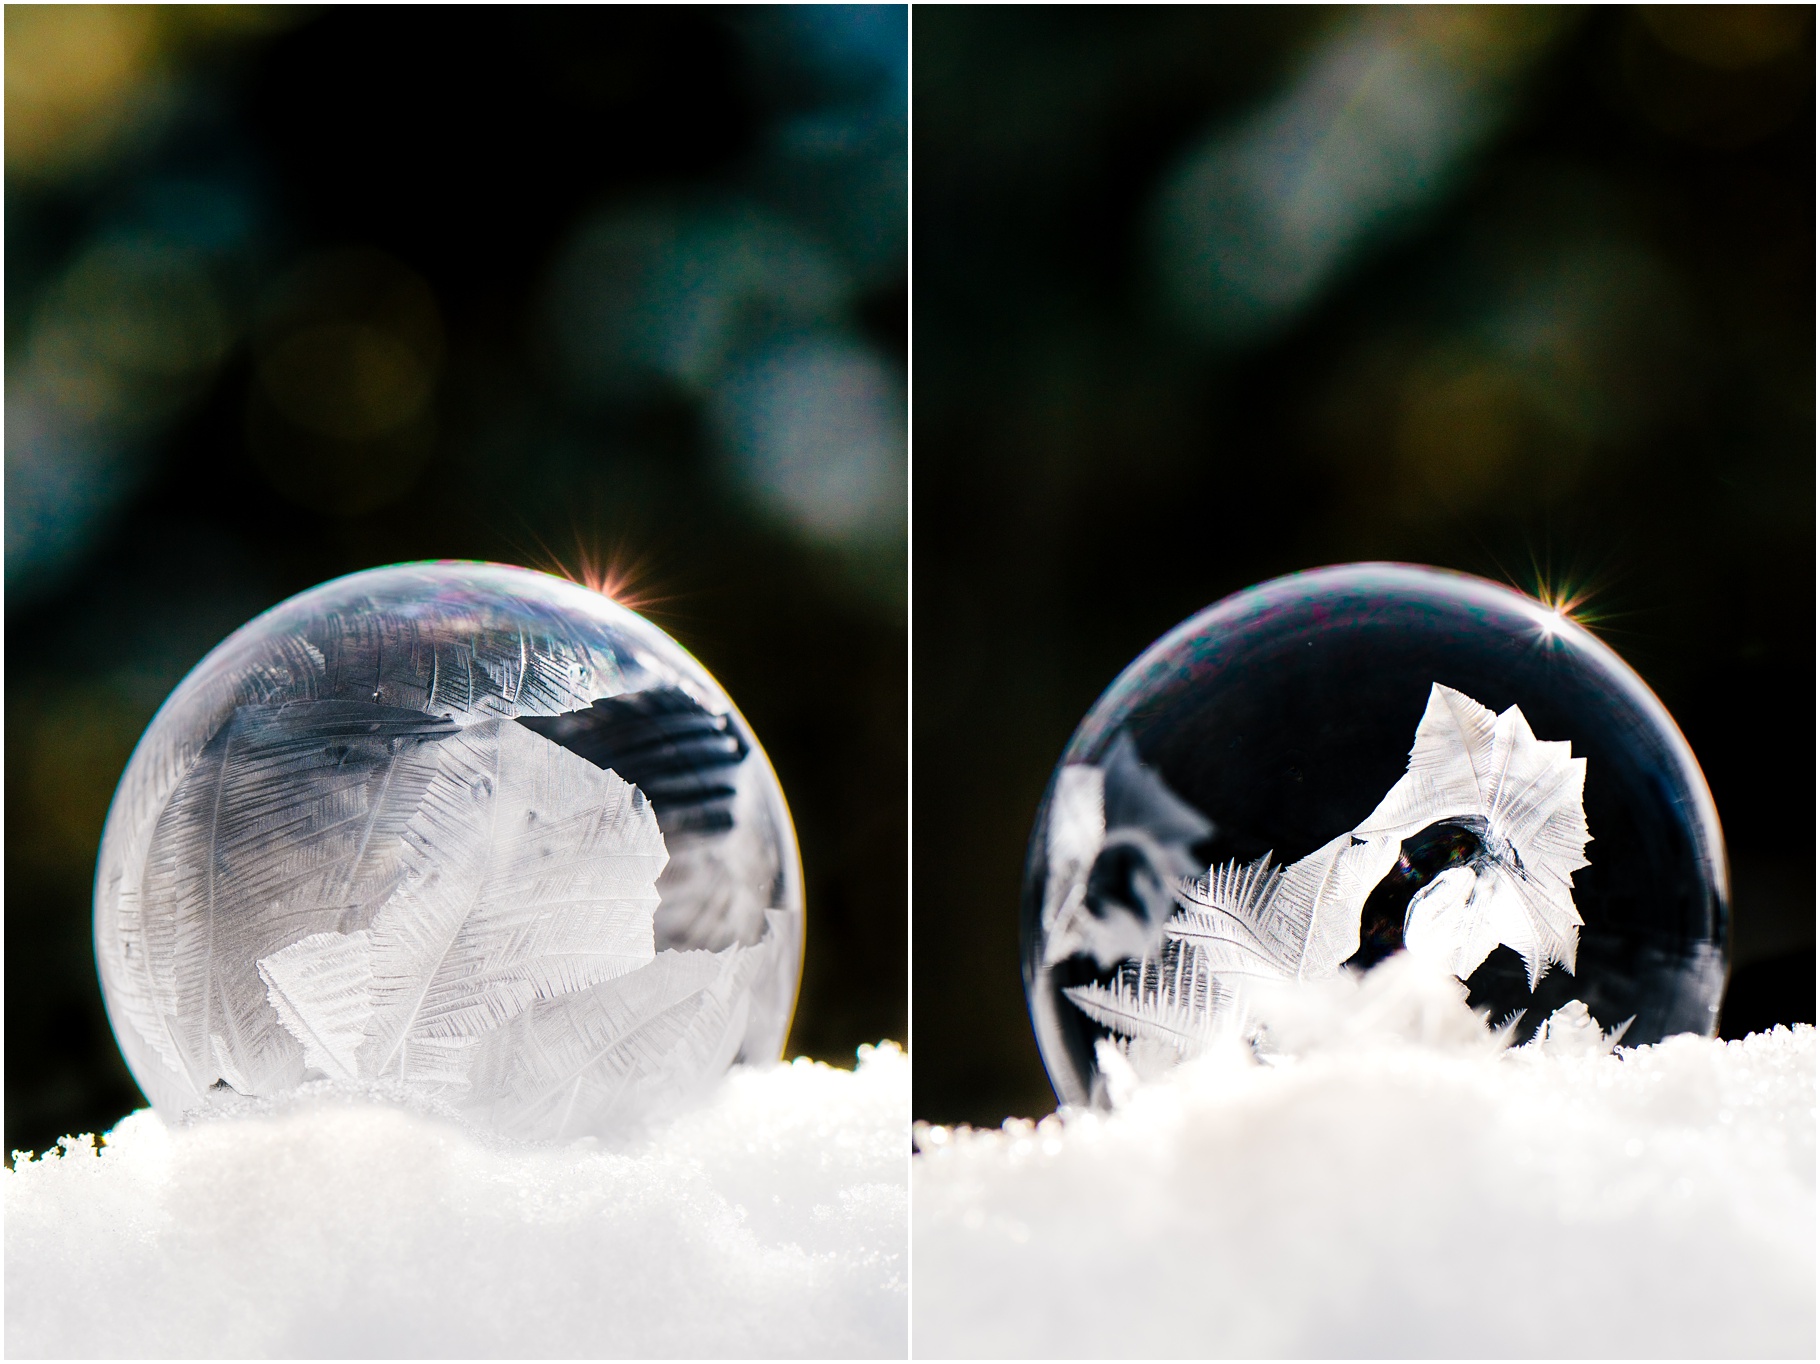

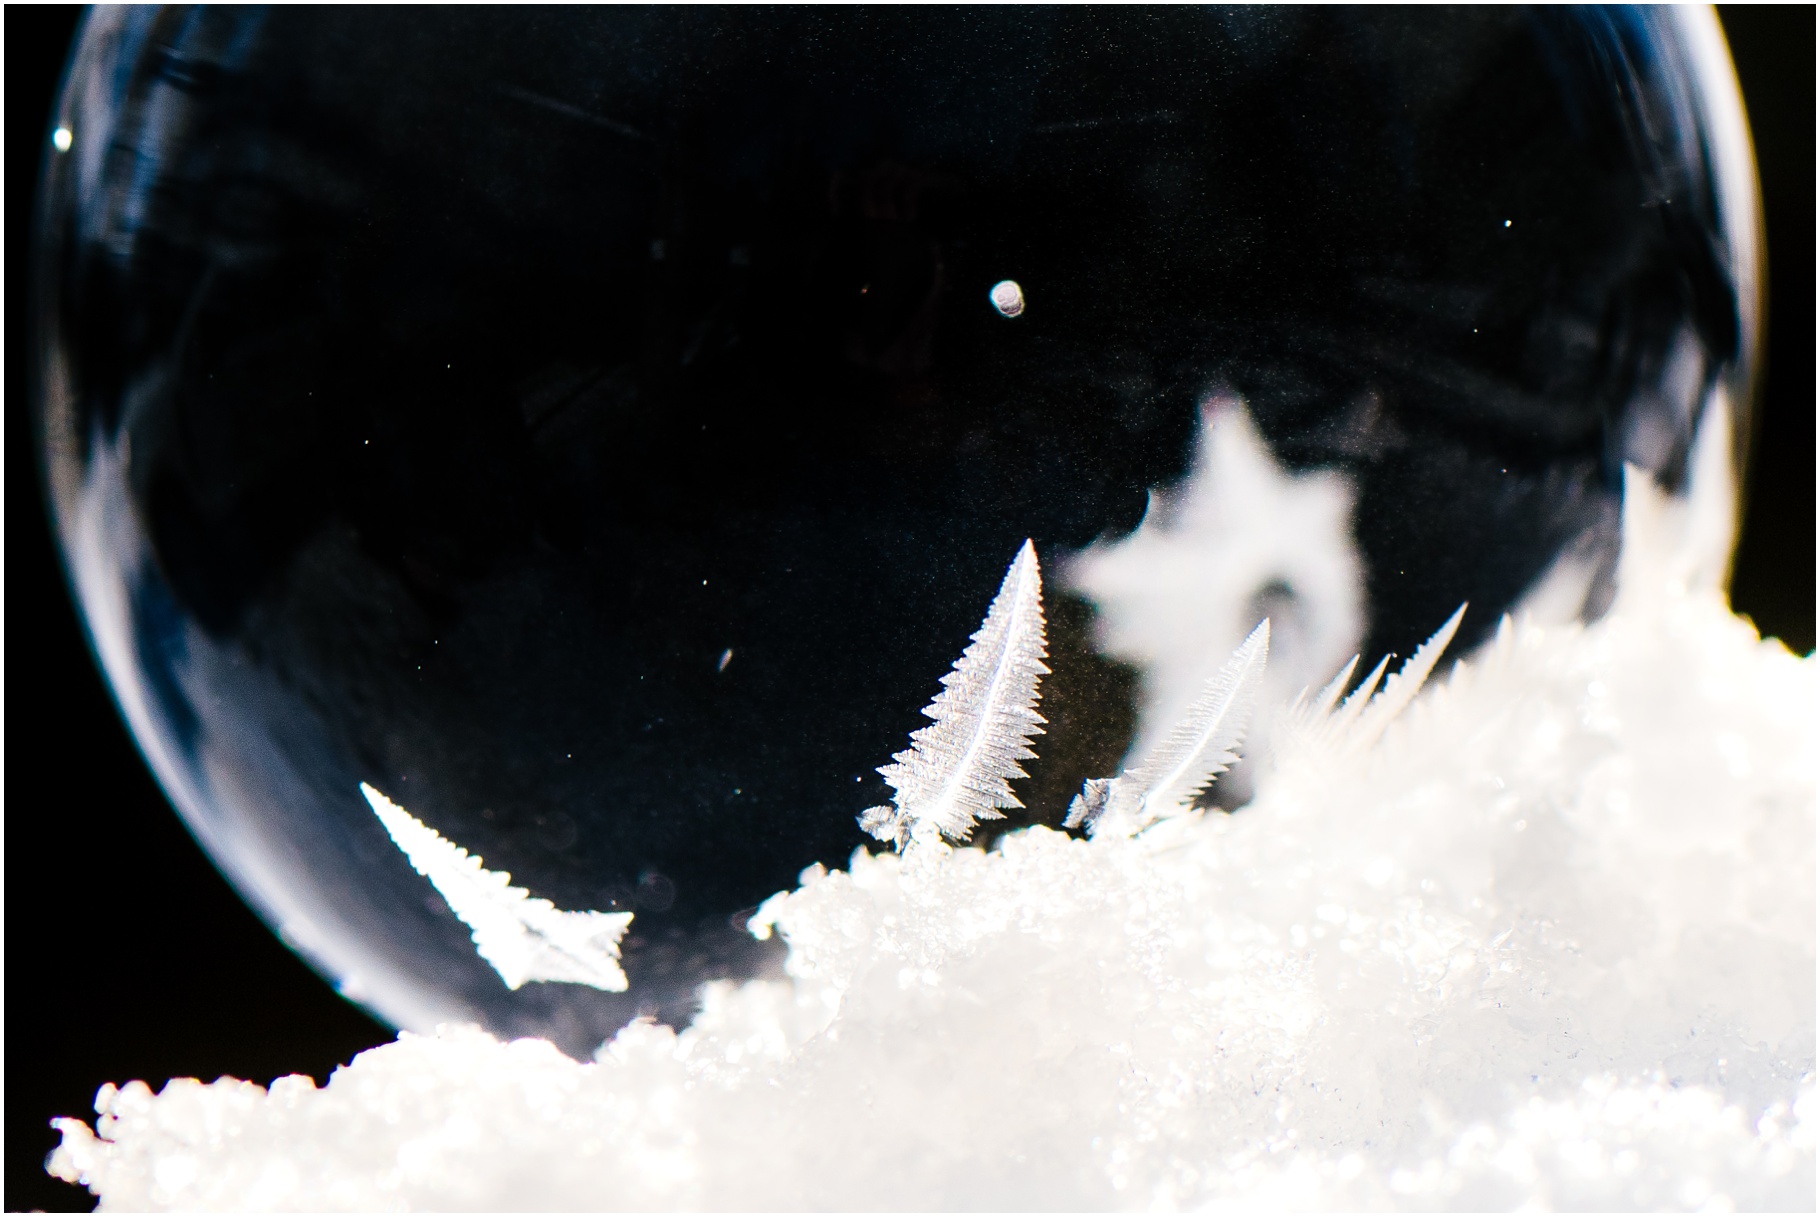
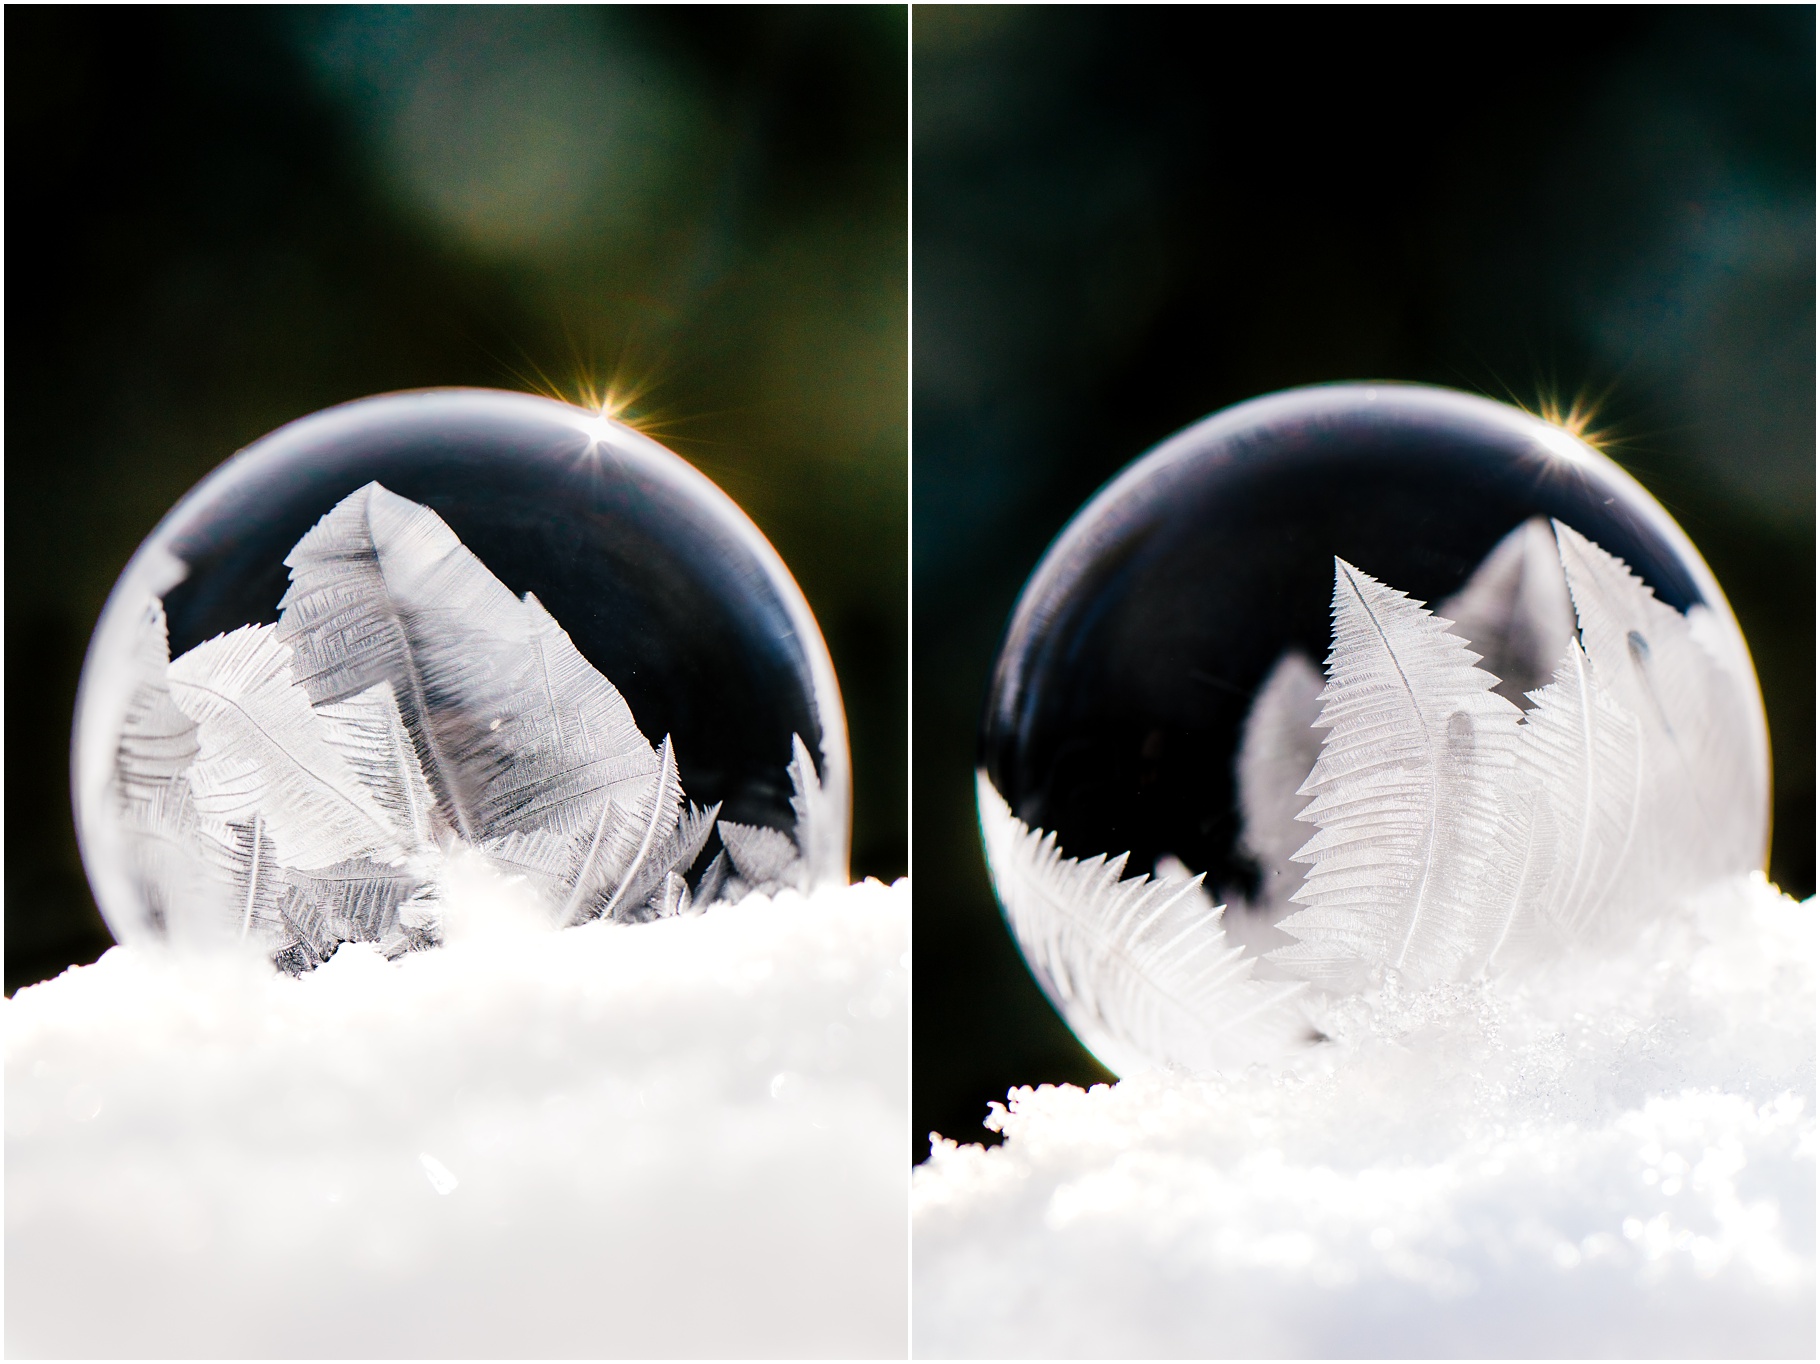
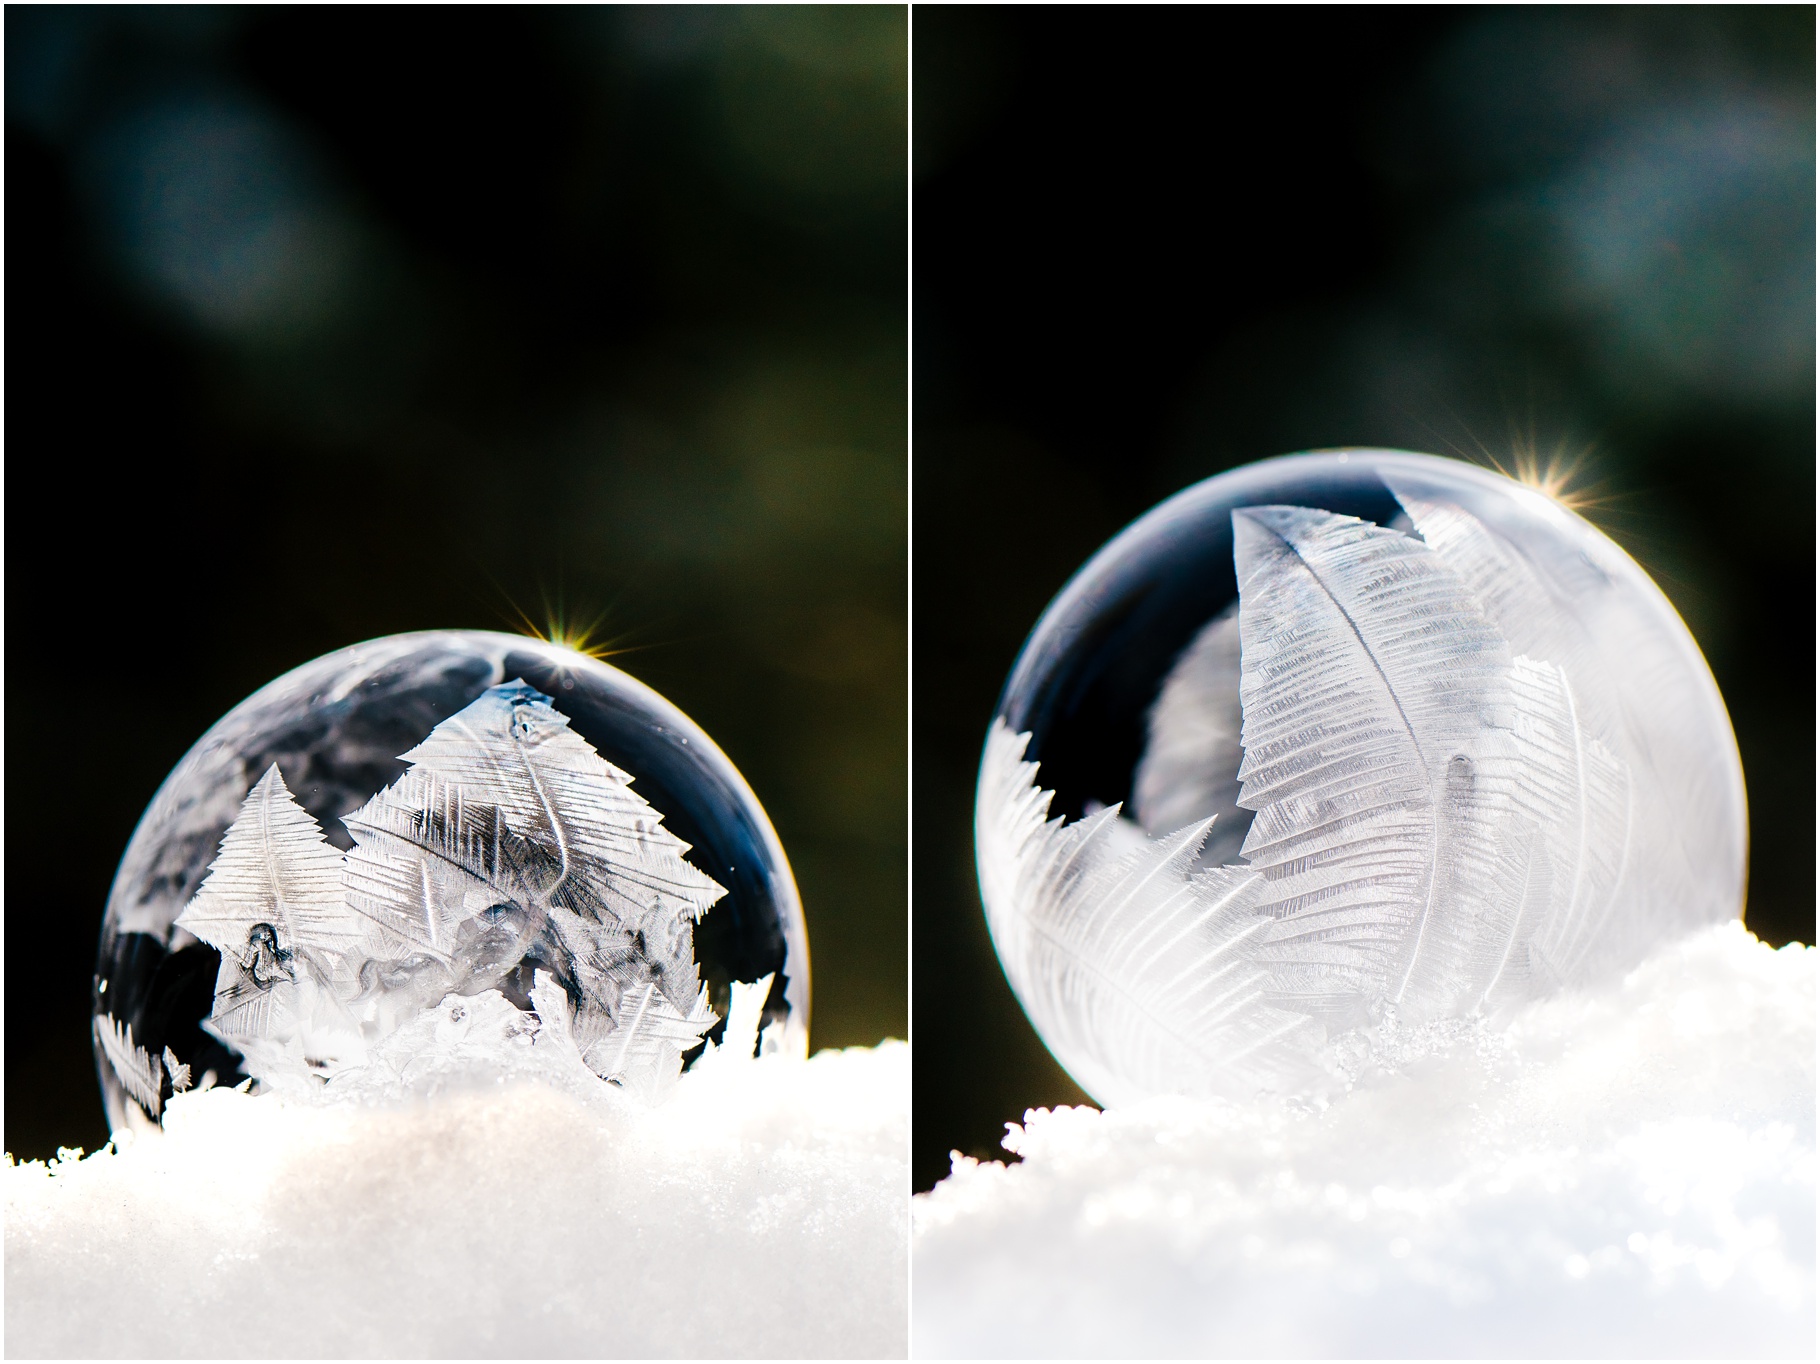
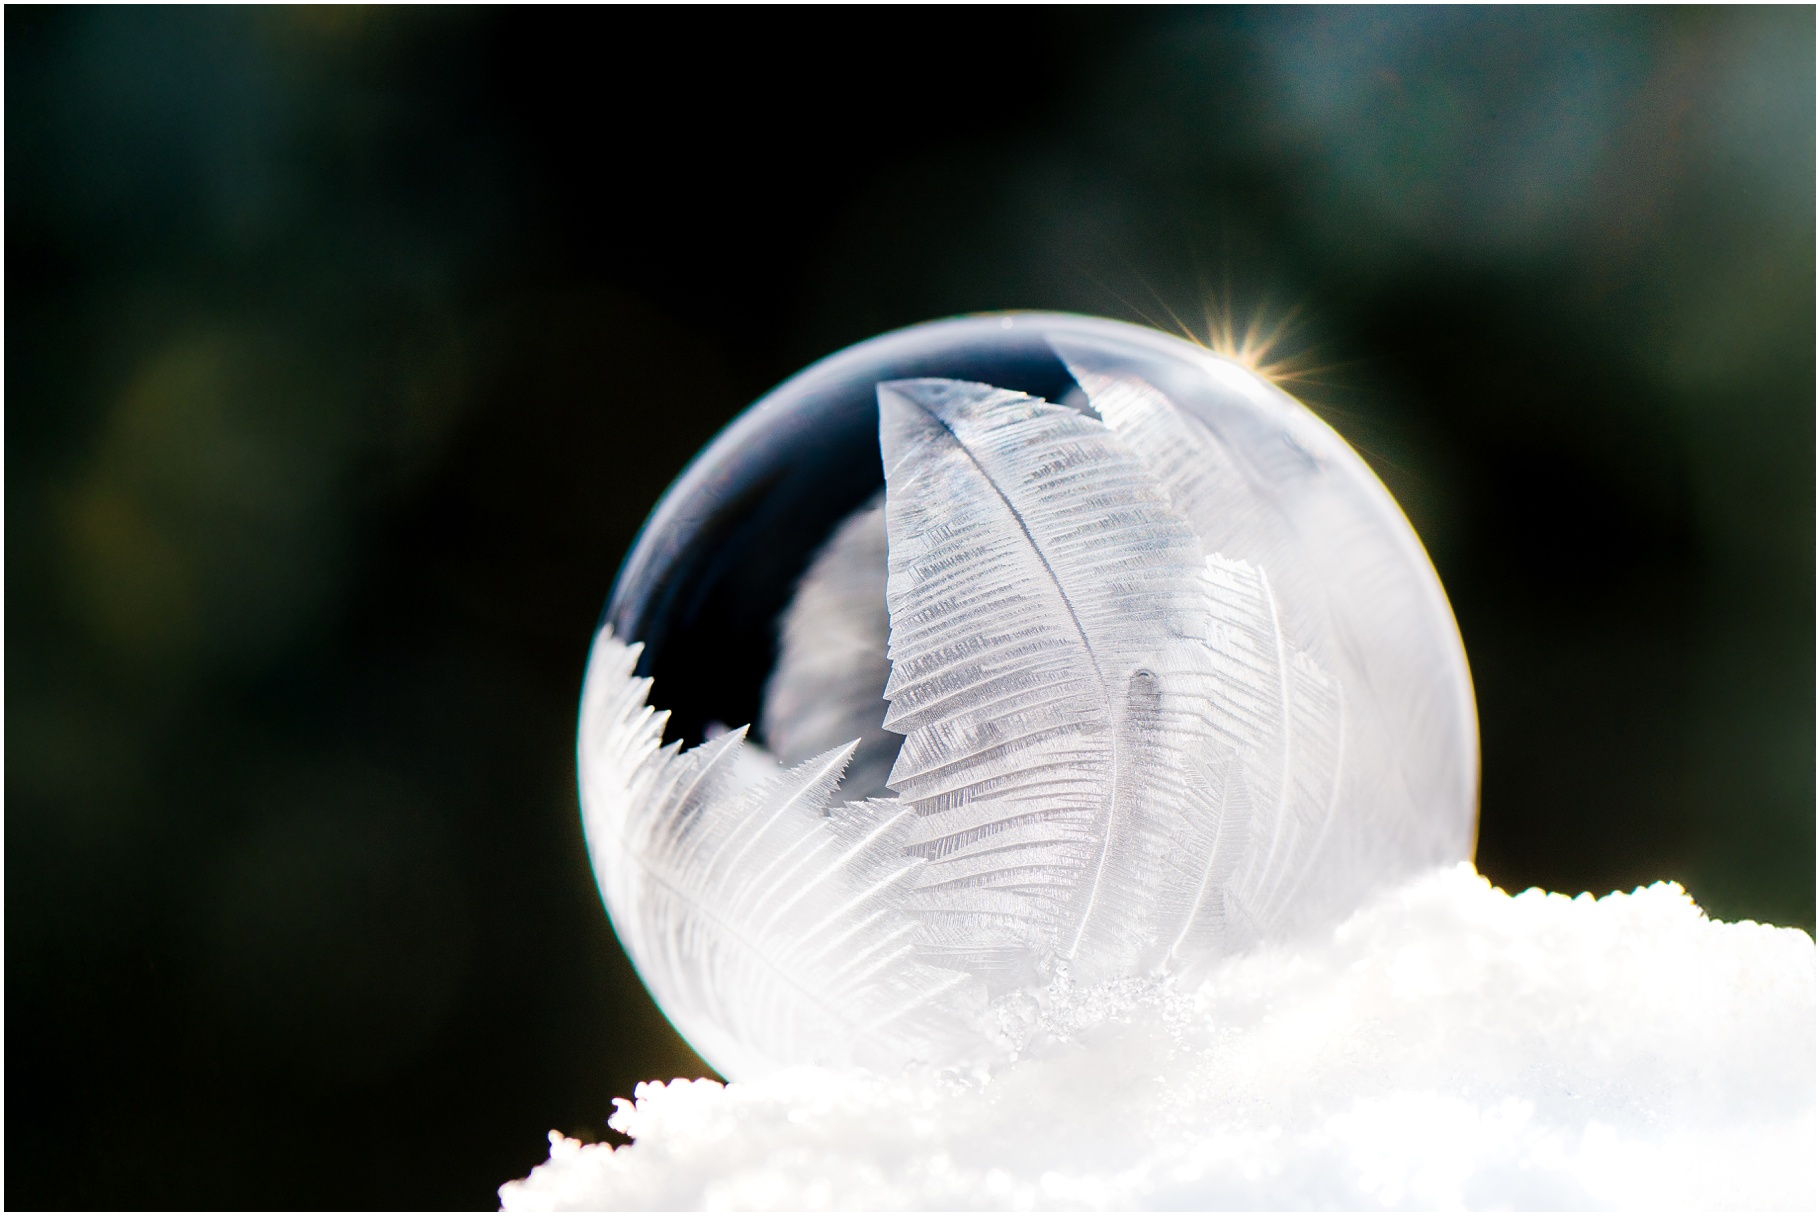
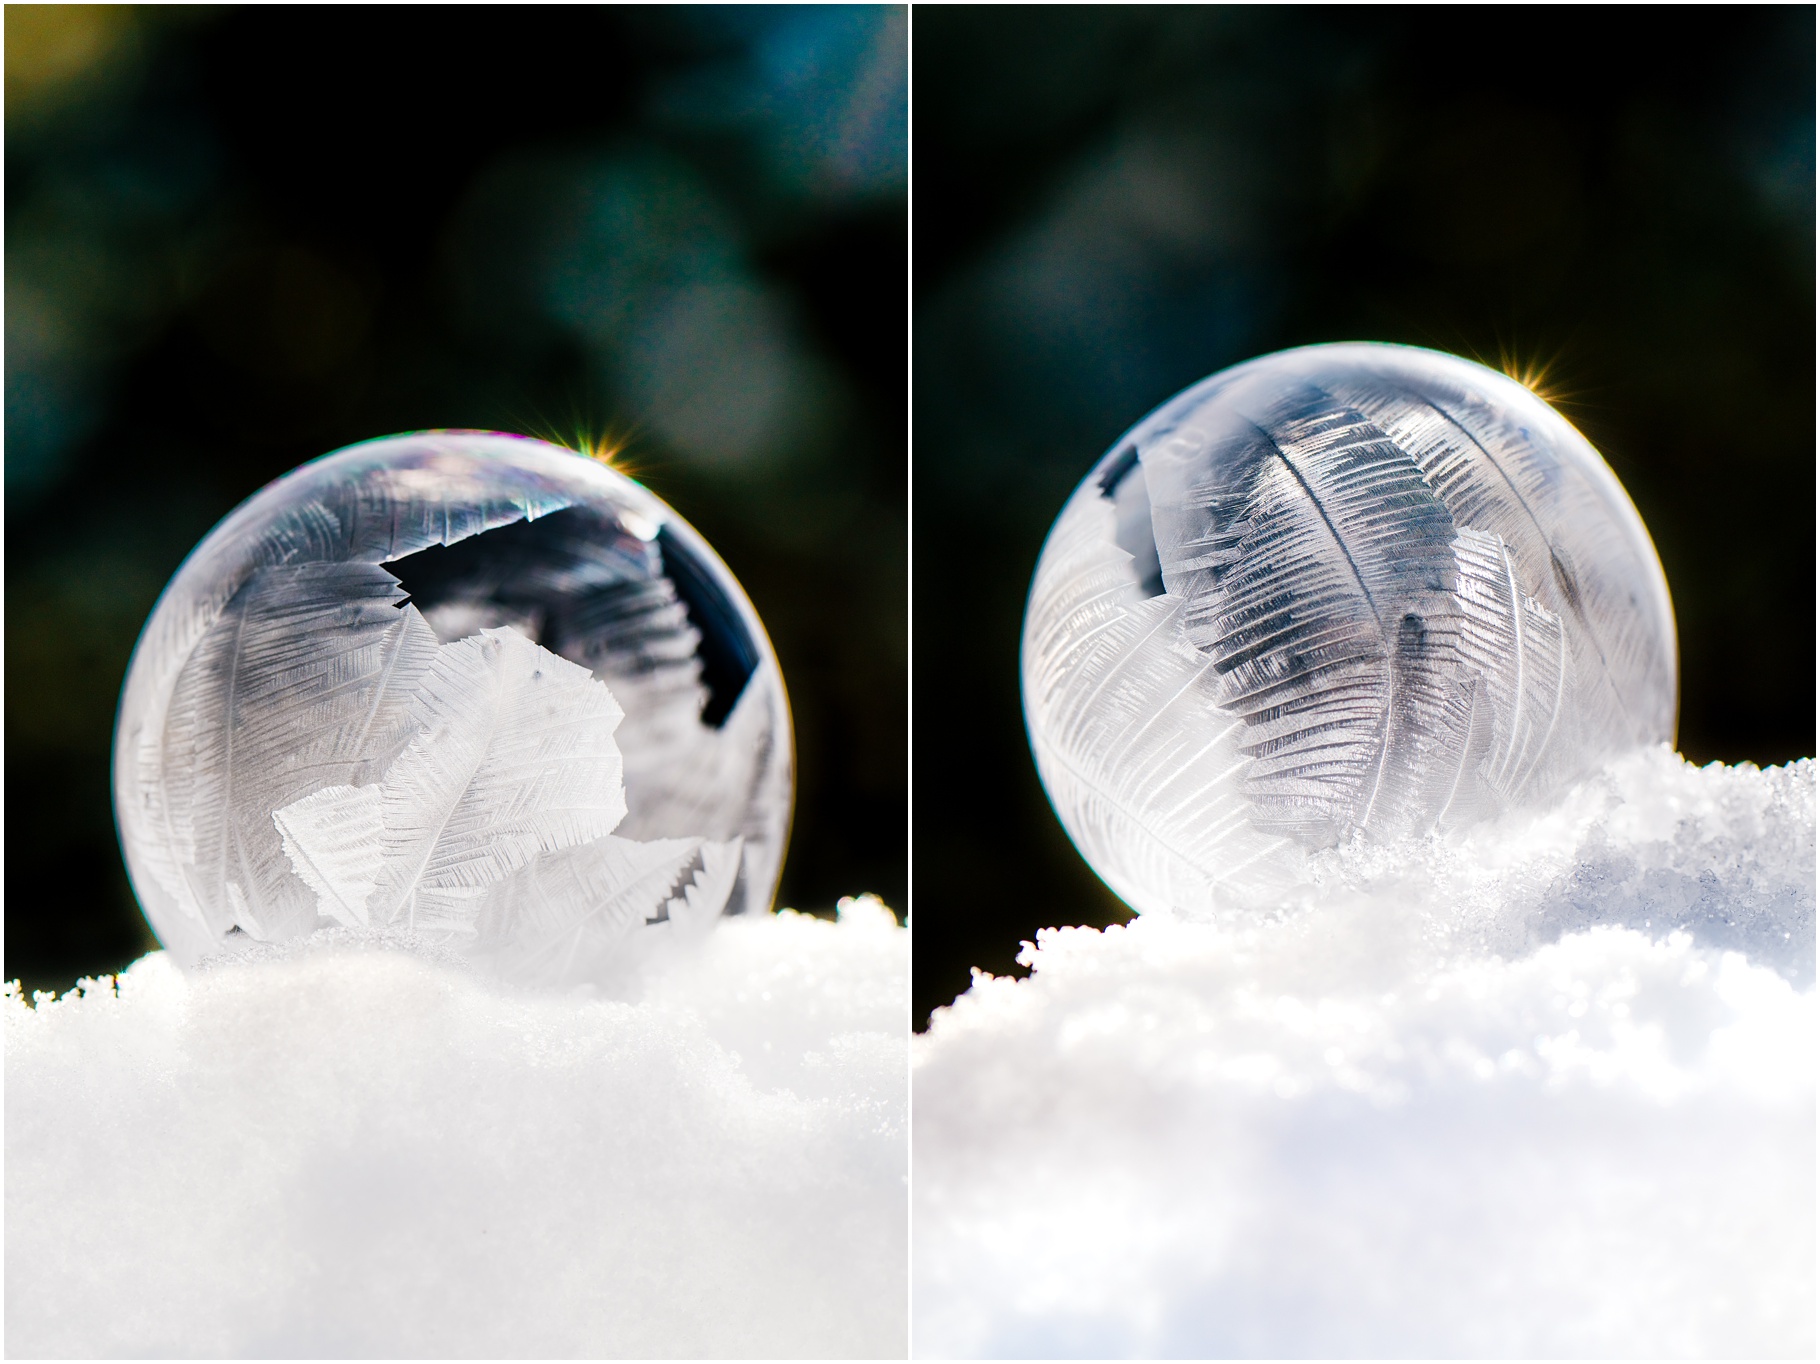
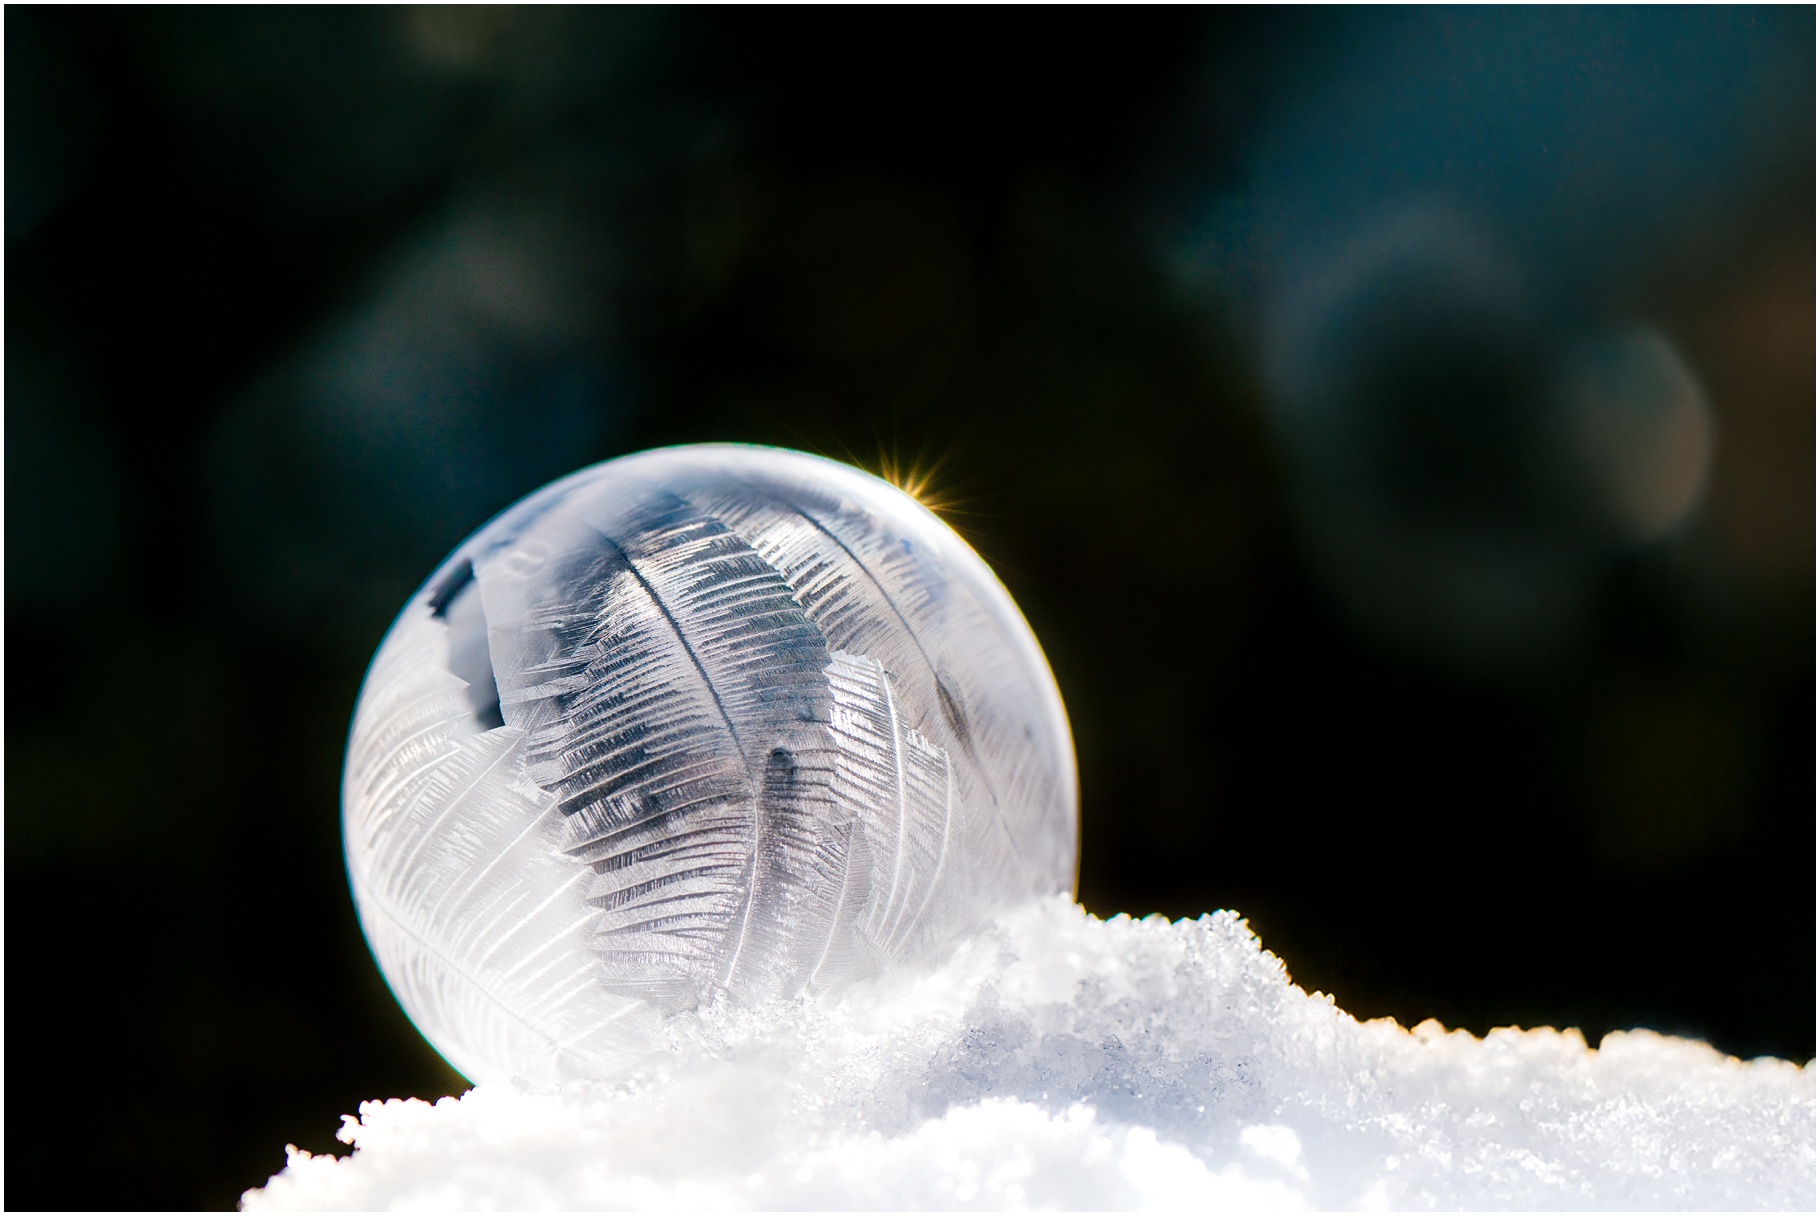
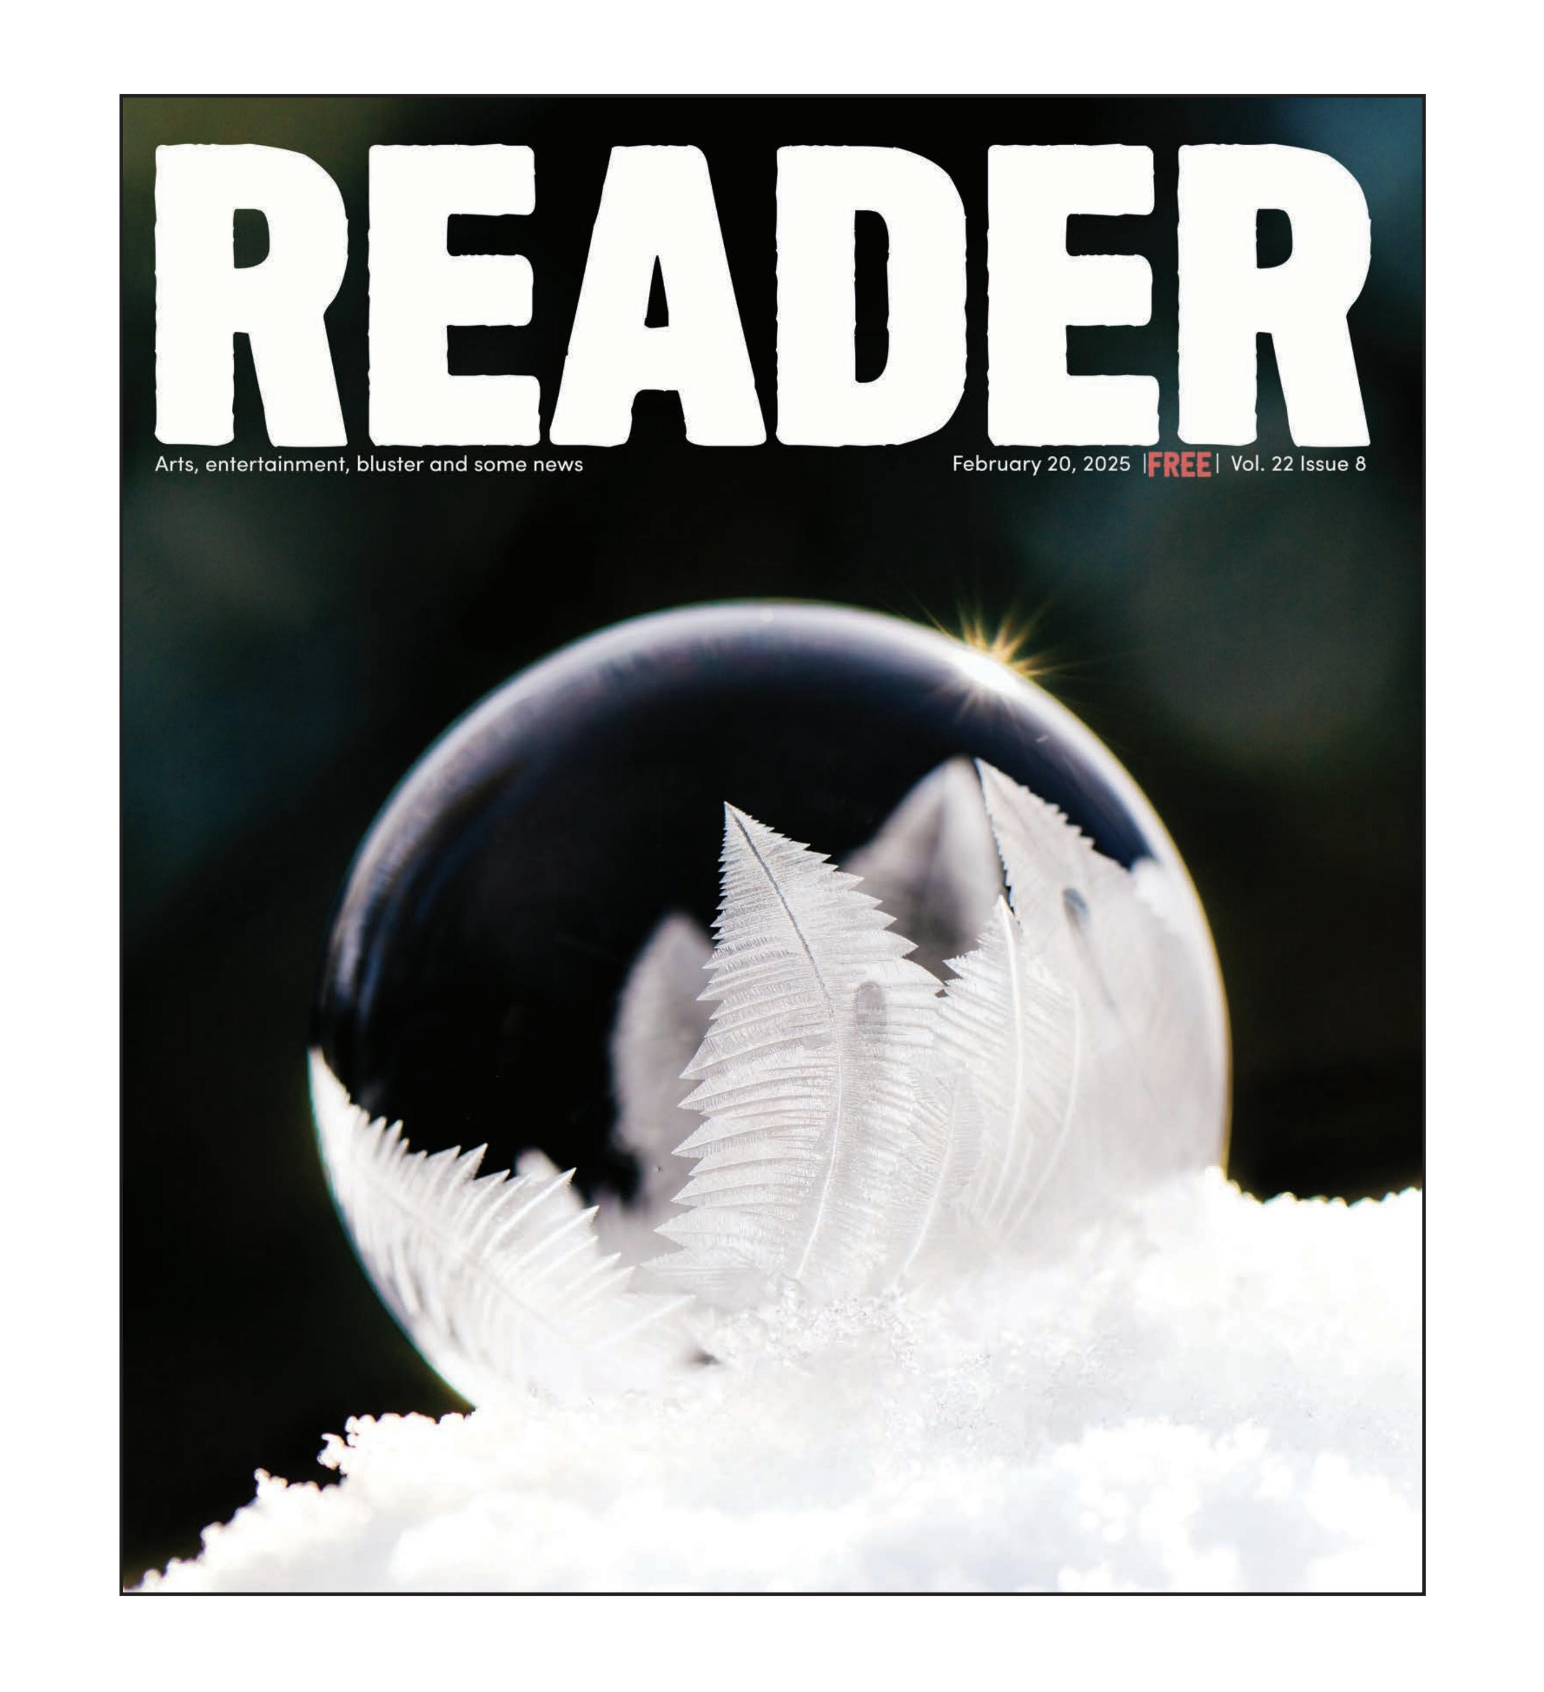
I was so thrilled with how amazing these images turned out. To be honest, when you’re working with a macro lens, it can be really tough to nail the focus on such fine details…especially when it’s constantly changing! I ended up submitting a couple of these images to a local paper, and they ended up using one of them as their cover photos. How fun is that?!
Thank you for getting this far! I hope you find an opportunity to someday make your own frozen bubble solution. And instead of being bummed that it’s below freezing, you can make something beautiful!